- 1.How to record student attendance?You can keep track of student attendance at lectures or seminars using the Attendance application. The recorded student attendance is then automatically transferred to a special notebook.
You can find the application viaThe Information system Teacher [course selection] (Attendance) recordsThe application works only if a timetable is in place for the seminar group or lecture. The individual seminars and lectures will be displayed in three sections:- The section "seminar groups a student in the selection has enrolled in" shows the seminars attended by students selected in the filter.
- The "lecture" section.
- The "examination dates" section shows examination dates that are created in the selected course.

1 Attendance records for the selected seminar for the entire semester.
2 Attendance records for the selected seminar for the selected days.

1 Attendance records for the selected seminar group.
2 Links to applications for further work with attendance.

1 Attendance records for a selected date – – adding a student from another seminar group.
Edit attendance only through the Attendance application, not by editing a notebook.
The data on student letters of excuse is also transferred to the attendance application, so if a student has a letter of excuse entered, the letter "O" or "OPT" will be displayed next to the excused seminar/lecture for a letter of excuse entered after the deadline. It is then up to the teacher whether or not to credit the student's attendance in these cases.
- 2.How can I evaluate attendance records?AYou can find the attendance evaluation application viaThe Information system Teacher [course selection] (Attendance) summaryThe application works only if a timetable is in place for the seminar group or lecture and attendance is recorded.
First, select the seminar group for which you want to evaluate attendance and set the parameters according to which attendance will be automatically evaluated, e.g. how many excused and unexcused attendance are allowed, etc. Parameters are set for each seminar group or lecture separately and can be edited later.
1 Set parameters.
2 Student list display options.

1 Evaluation of attendance of the selected student.
- 3.Printing the attendance formFor each seminar group and lecture you can print the attendance form for the semester. In the header of the form is the identification of the seminar group. Below the list of students there are always a few blank lines in case a student joins the group after the sheet is printed. The number of columns depends on the number of seminars during the semester. The system omits non-working days. PUse the links to printThe Information system Teacher [course selection] (Attendance) Print attendance formthen select one or more seminar groups and select the desired printer. You can also choose from advanced print settings. You can also download the attendance form in the available formats to your computer.

1 Print the attendance form(s).
- 4.Record attendance using smart cardsIn the applicationThe Information system Teacher [course selection] (Attendance) Record attendance using smart cardsit is possible to record attendance by reading student smart card identifiers or automatically from the access point passage records, i.e. by "beeping" at the reading device outside the classroom door or at a portable smart card reader. Detailed procedure for a portable smart card reader.
- The teacher first plugs the smart card reader into the PC. The USB input can also be on the side of the monitor.
- After logging into the MU IS, the teacher selects the course in which he/she wants to edit attendance in the Teacher section and selects the application "Record attendance using smart cards".
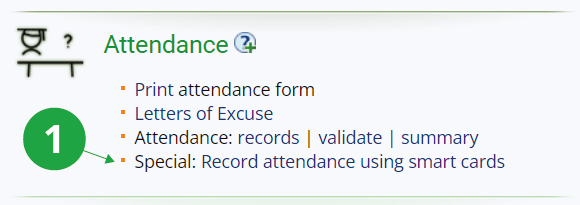
1 The application for recording attendance using smart cards is in "Attendance" section.
- In the application, the teacher selects whether to enter attendance for individual seminars or for the entire lecture and selects the correct date:

1 The selected course to which the attendance relates.
2 Entering attendance for individual seminars (if the course has them).
3 Attendance entry section for the lecture.
4 The individual dates of teaching for which attendance is recorded.
5 Attendance entry section for the examination dates (if the course already has them listed).
- After selecting the correct date, you need to start loading the individual smart cards in the "Smart card identifier" section. Just click in the field for entering the identifiers and then students can start attaching their ISIC cards to the card reader one by one. One by one, their card code is then loaded into the field.

1 You need to click in the field to enter the identifiers and only then can students attach the smart cards.
2 Once all the smart cards from the students have been loaded, you need to click on "Import".
- Once all the smart cards have been loaded, you need to click on "Import". Then a list of all students in the course will be shown and there is a checkbox for each student. A student who has beeped their ISIC will have a check mark in the box and one who has not beeped will have the box blank. This is the point at which a teacher can also manually mark the attendance of a student who came in but did not have an ISIC.
- After checking the created attendance list, the teacher can save it at the bottom of the page.

1 The created student attendance list needs to be saved below.
For faster student check-in, it is a good idea to set up your reader before students are allowed into the classroom. Once the teacher has the reader set up (i.e., the reader plugged in and the cursor in the "Identifier upload" field), he or she can start letting students into the classroom by having each student beep his or her card before sitting down. You can keep a record of the beeps until the beginning of the class, then save the attendance list and enter the attendance for all latecomers in the same way (i.e. by beeping again with the reader) at the end of the class.
- 5.How do I enter attendance for those who are late and do not have attendance entered via smart card?
In the application
Information system Teacher [course selection] (Attendance) Attendance: recordsit is possible to enter individual attendance to students who are late for class and did not beep their ISIC card at the beginning.
1 In the attendance application, it is possible to edit student attendance records.

1 The "Select a concrete day" option displays the individual days of the lessons according to the timetable.
2 It is necessary to select a specific day for which the teacher wants to edit attendance.
3 Then confirm the selection by clicking on the "Selected" button.

1 By checking the box, the teacher indicates that the student was present in the lesson.
2 The edited attendance record needs to be saved.
- 6.Changes in seminar groupsIf there are changes in the number of students in seminar groups during the semester, use theThe Information system Teacher [course selection] (Attendance) validateValidation will cause students who have moved to a different seminar group during the semester to move to the correct notebook. The application also allows you to remove from the attendance record students who have opted out of seminar groups but have not enrolled in elsewhere. If you wish to remove a student whose study has been terminated, you must do so by validating the appropriate notebook.The Information system Teacher [course selection] (Poznámkové bloky) Zobrazit nabídku validace poznámkových bloků
Provided you have failed to find the information you were searching for, you can contact us at  fi
fi municz