Progressive lens centering
Introduction
Progressive lenses are used for correction of ametropia and presbyopia. As the eye is changing its position behind progressive lens it changes the addition. Progressive lens contains so called micro-signs (laser signs) and printed signs. These signs enable better lens centration.
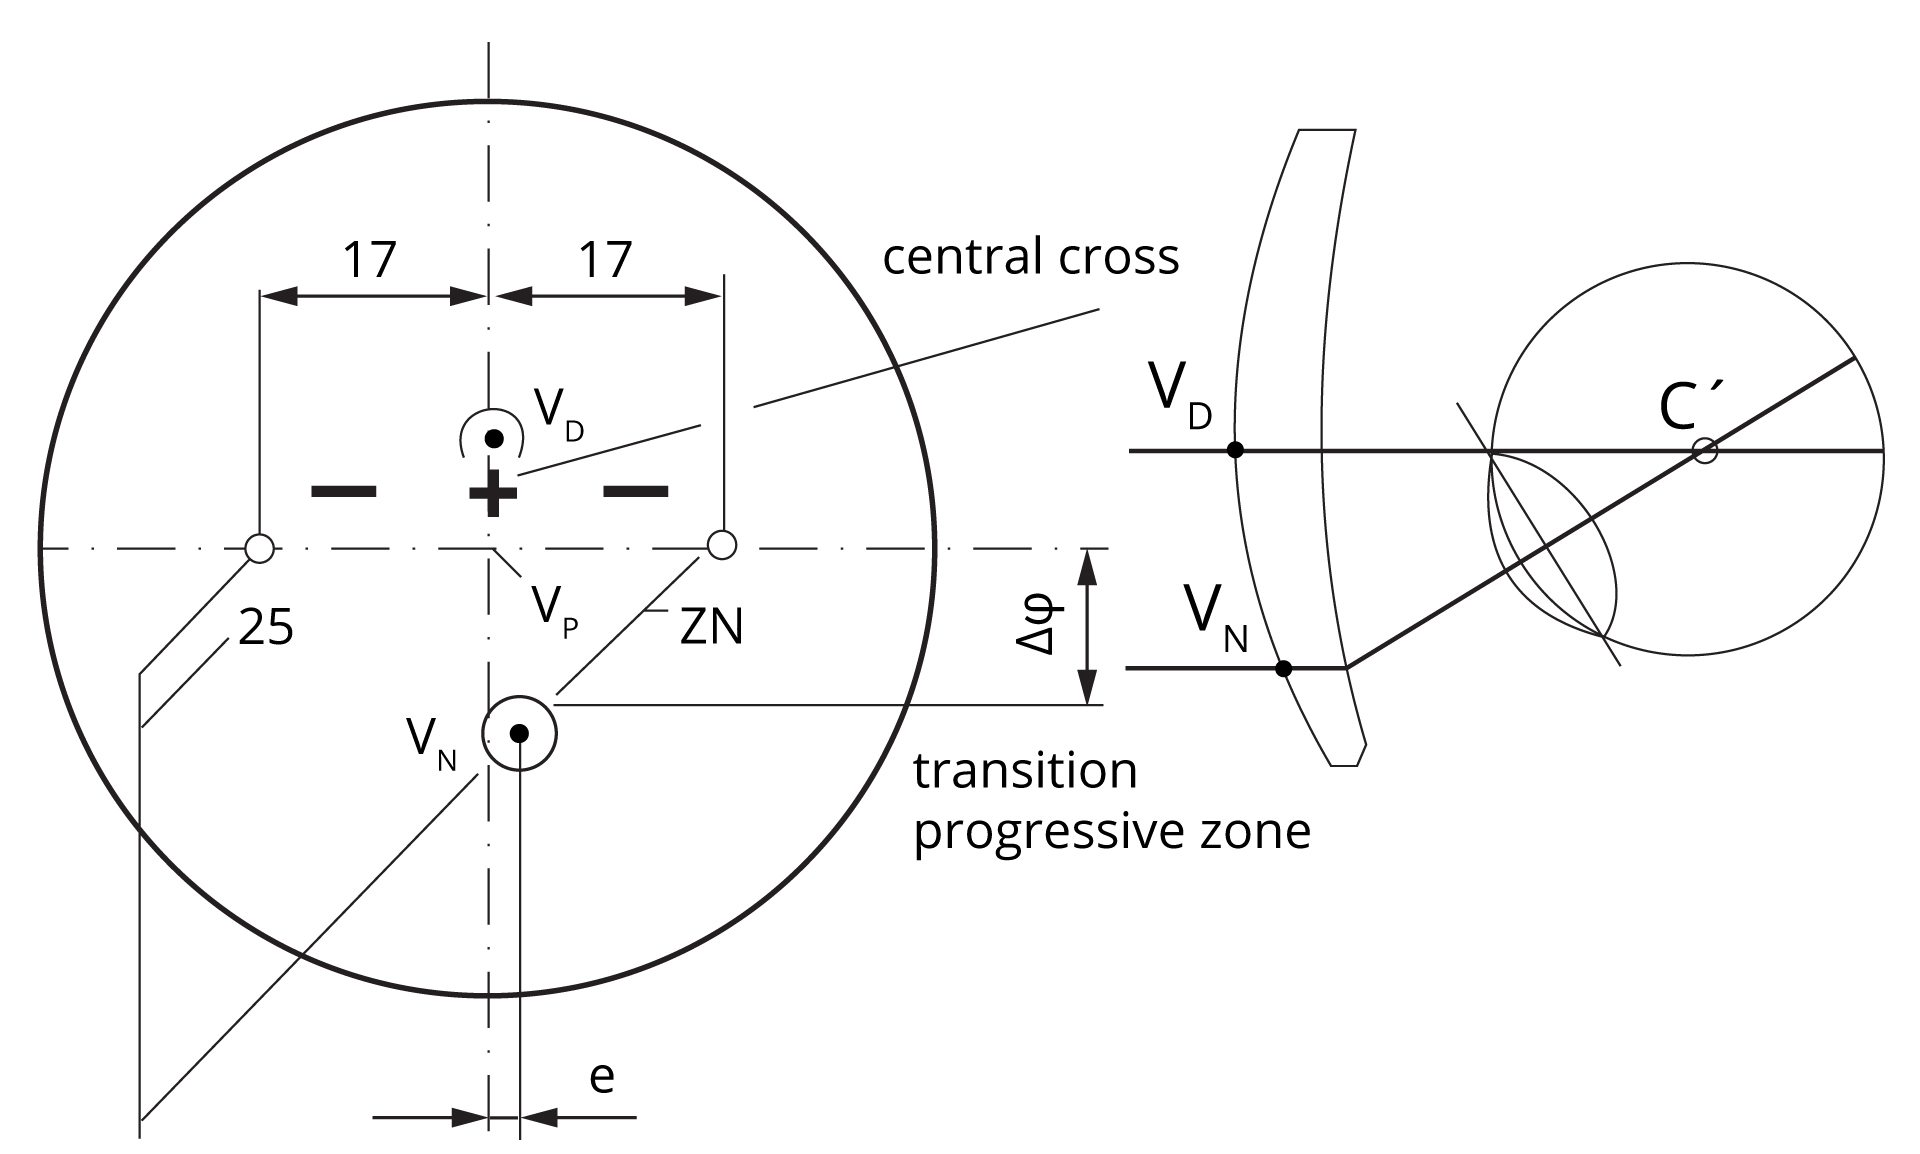
Between distance and near point we have centration point for prism. In progressive lenses is often used so called reduction prism with BD. Progressive spectacle lenses are constructed with aspheric surfaces so we have to center them very exactly.
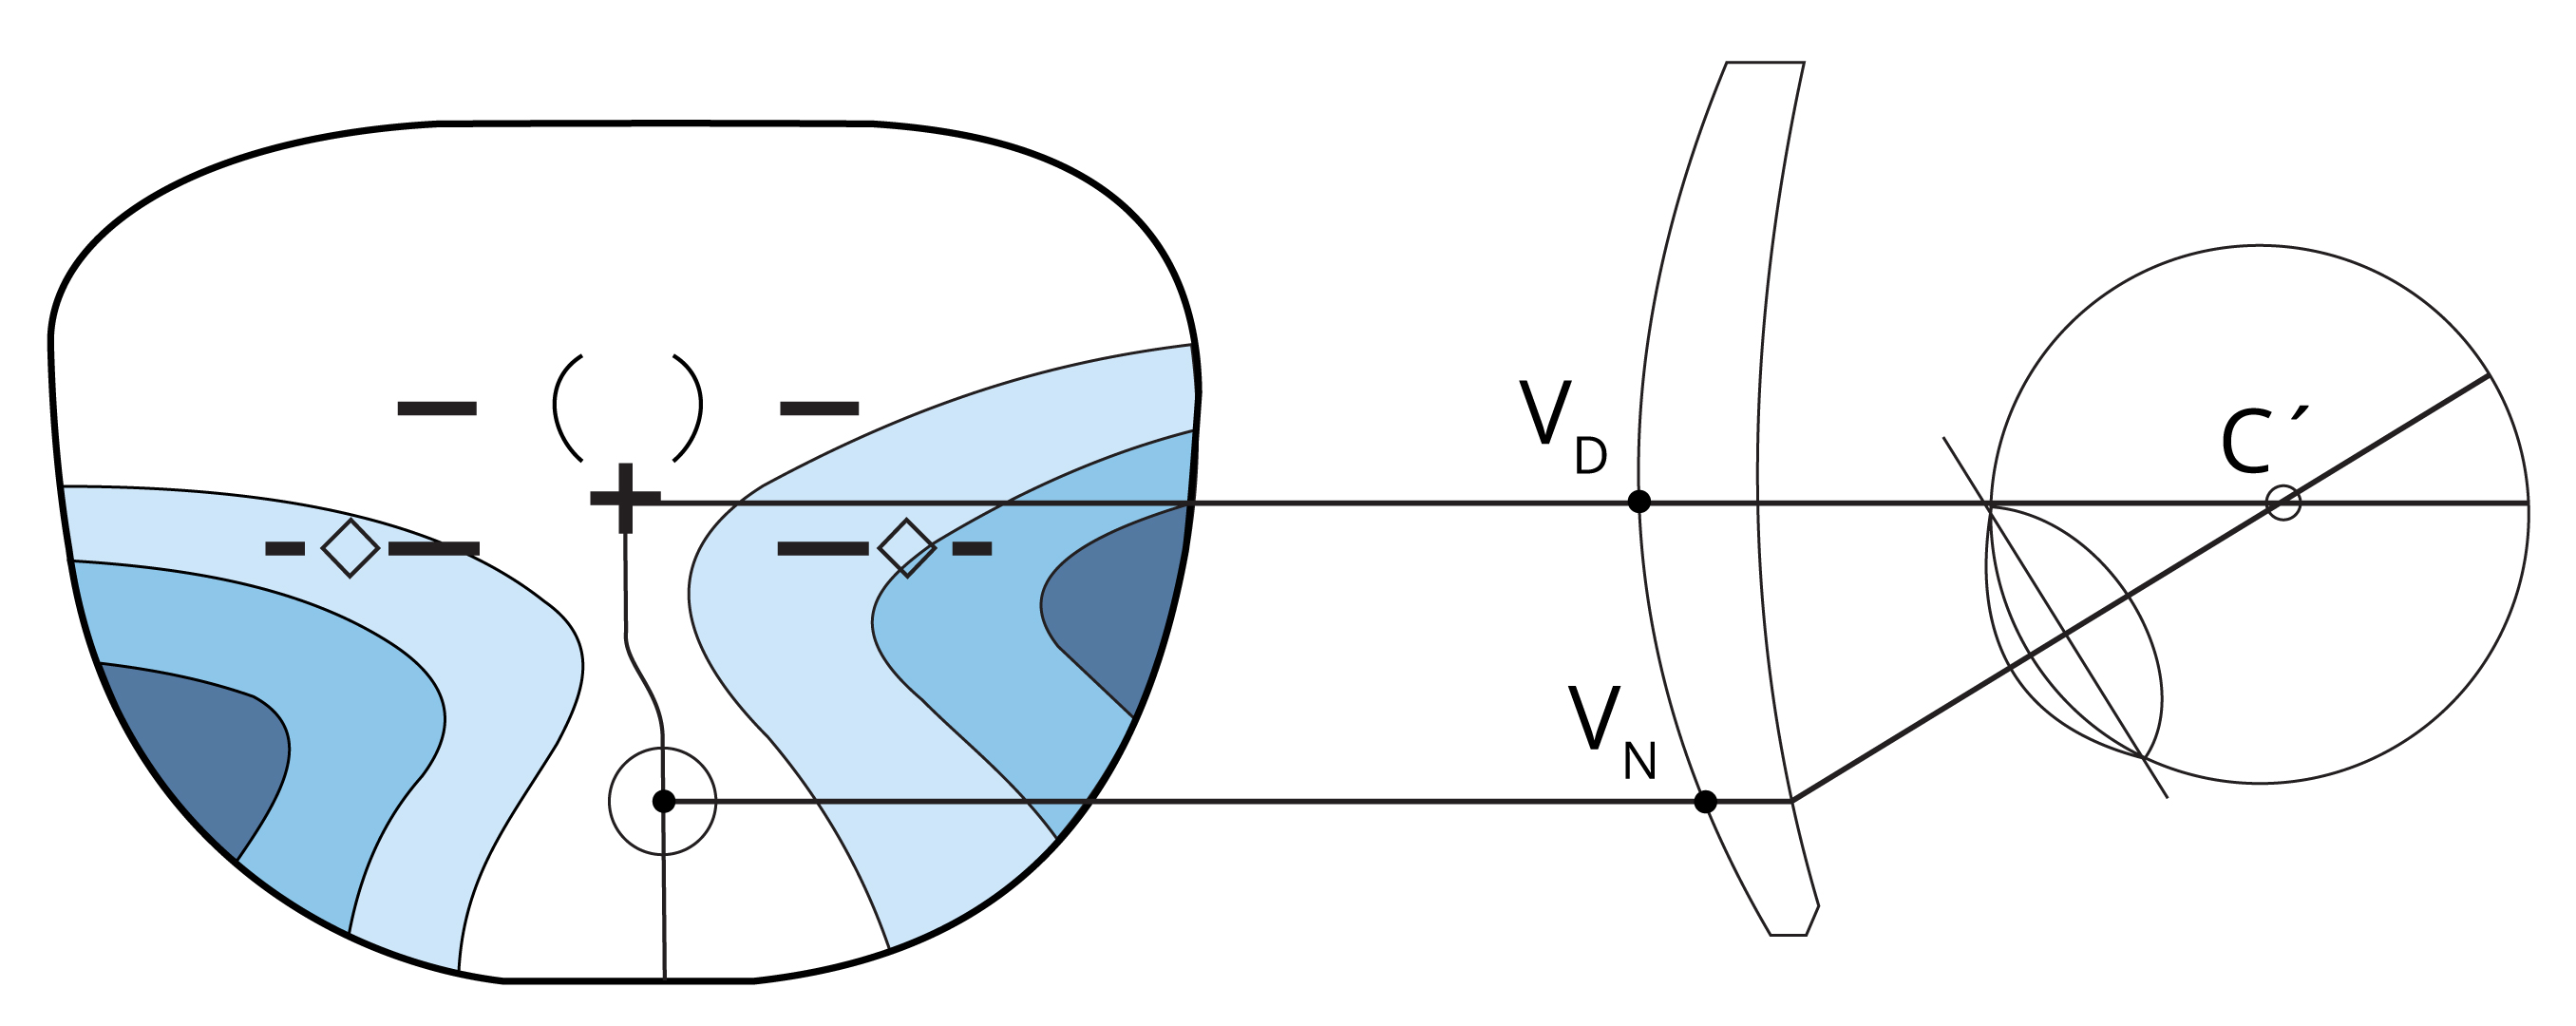
Progressive lenses are centered with distance centration point (VD) placing in pupil during natural distance view. In conventional progressive lenses is defined horizontal and vertical near main point decentration (VN, 2 – 2.5 mm nasally, Rutrle 2001).
Goals
- Center progressive spectacle lens
- Verify near convergence with mirror method
- Schematically draw progressive spectacle lens and mark all important point in it.
- Schematically draw iso-spherical lines on progressive lens
- Schematically draw iso-astigmatic lines on progressive lens
Equipment
Progressive spectacle lens, special pencil on demo-foil, spectacle frame, mirror with fixation point.
Methods
Center progressive spectacle lens
Patient wears spectacle frame. Measure and test frame’s pantoscopic angle to ensure if the frame is suitable for progressive lens. Further center progressive lens with distance centration point to be placed on pupil during natural distance view. Measure height from pupil to lower part of the spectacle eye and decide if the frame is suitable for this type of progressive lens.
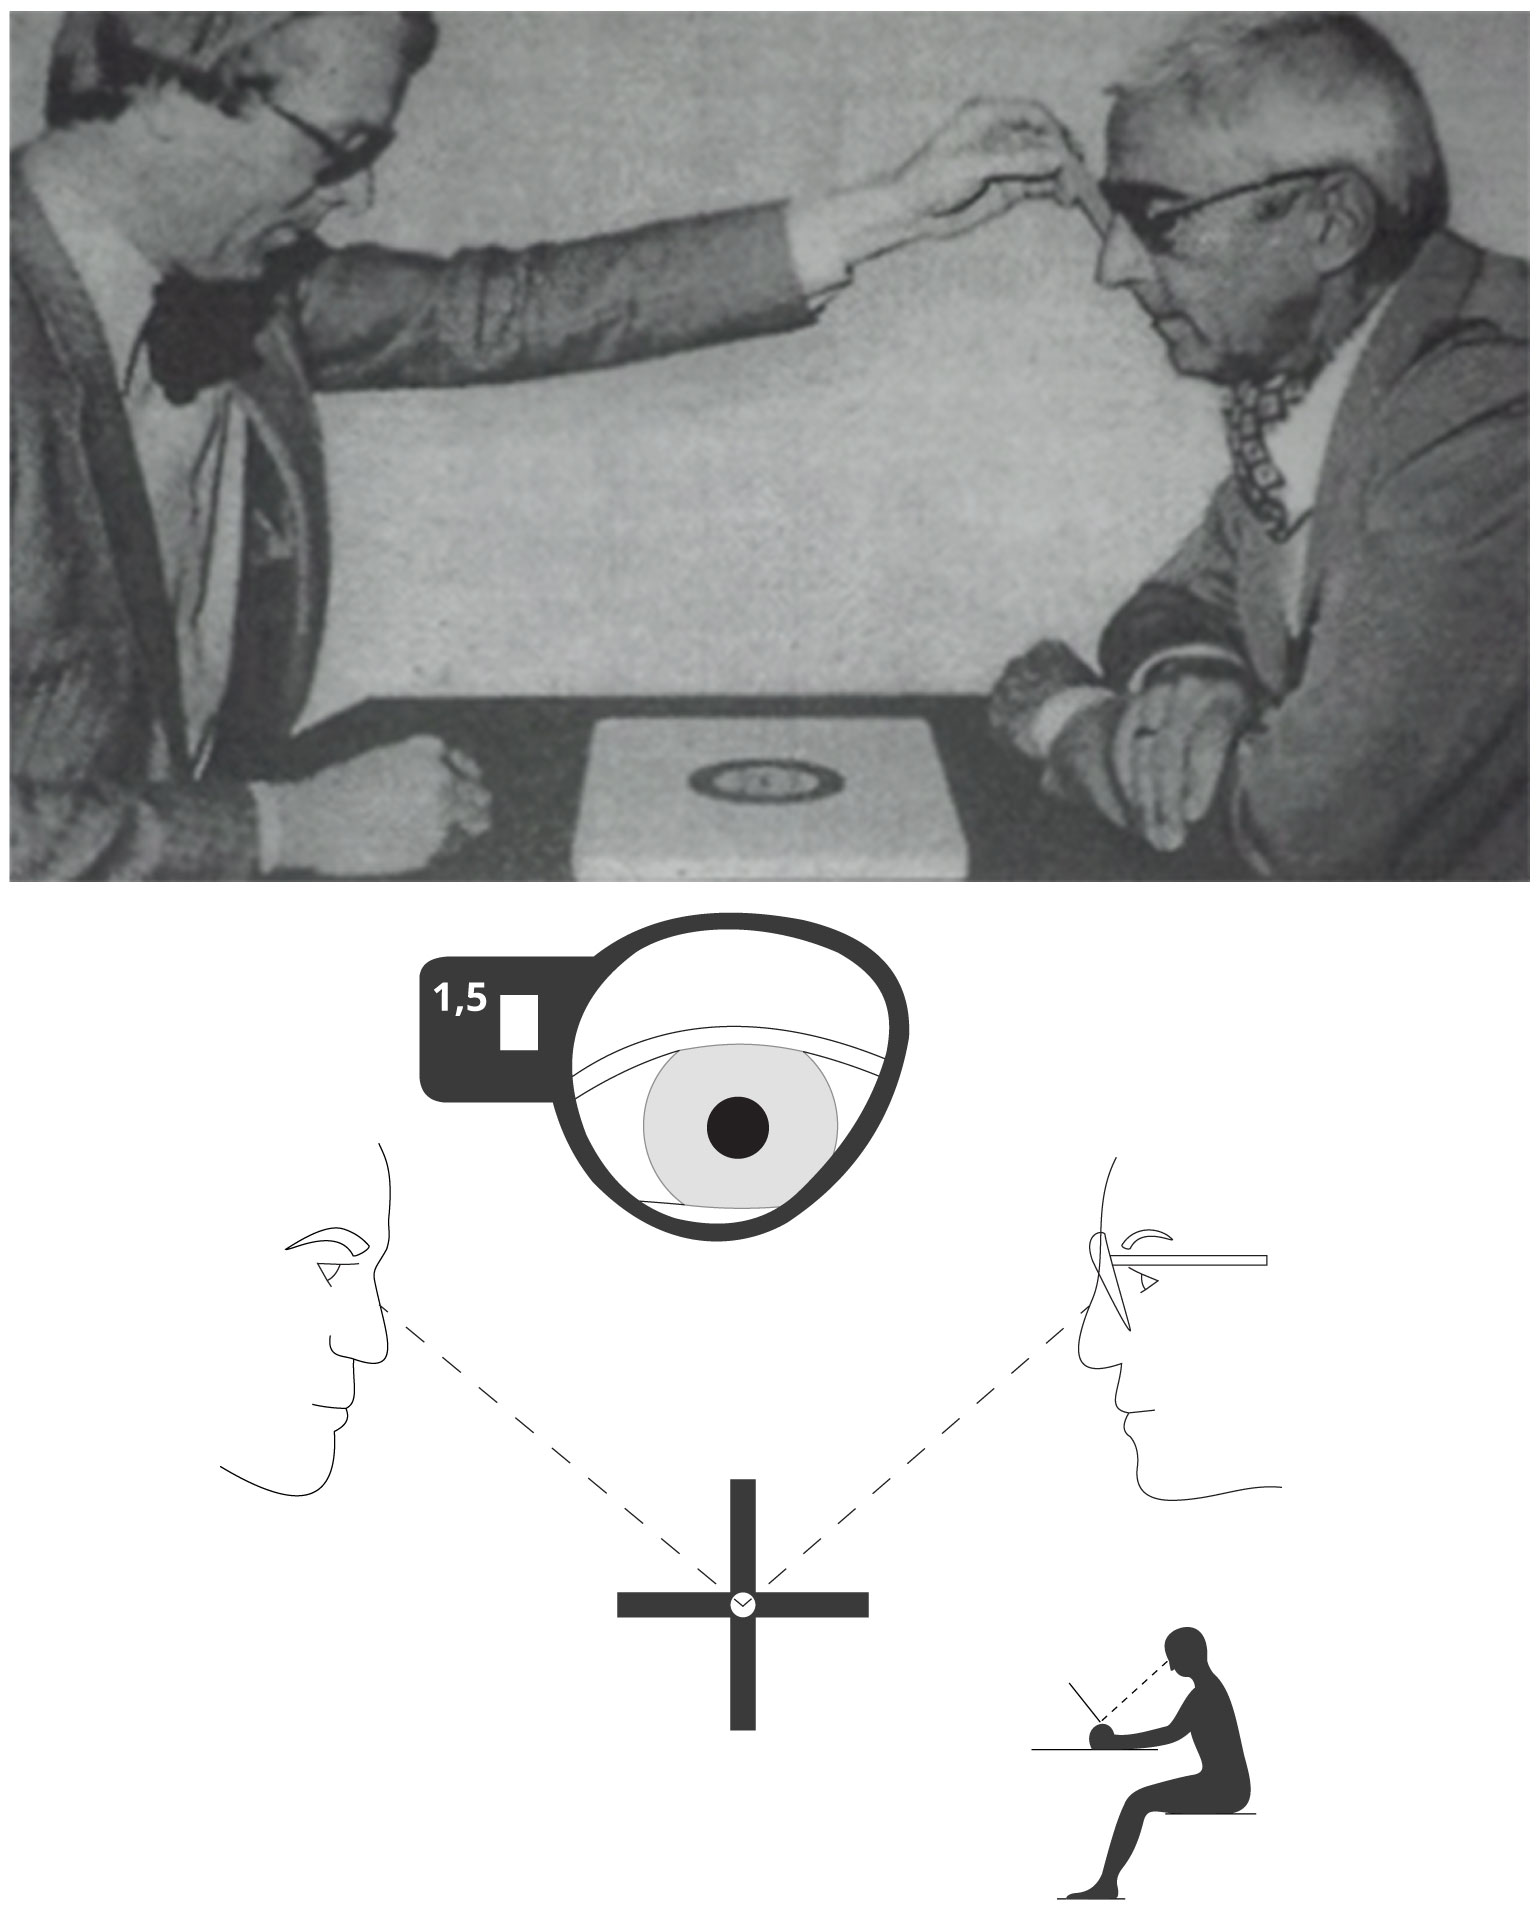
Verify near convergence with mirror method
With help of centration chart (ditest) draw important points of progressive lens on spectacle frame’s demo-foils. With help of mirror verify if these progressive lenses are suitable for the patient. Check the convergence through the mirror. If the convergence is adequate pupils during near gaze are placed on near important centration points.
Schematically draw progressive spectacle lens and mark all important point in it.
Schematically draw iso-spherical lines on progressive lens
Schematically draw iso-astigmatic lines on progressive lens
Results
Center progressive spectacle lens
Pantoscopic angle (α) =
Height of distance centration point (yD) =
Recommended type of progressive lens – short, middle, long (14, 18, 22 mm)
Verify near convergence with mirror method
Convergence adequate/excessive/insufficient
Schematically draw progressive spectacle lens and mark all important point in it.
Schematically draw iso-spherical lines on progressive lens
Schematically draw iso-astigmatic lines on progressive lens
Discussion
Progressive lenses are very often used today. Except classical conventional progressive lenses we can use special individual progressive lenses which are usually made with free-form method. For centering of individual progressive lenses we need to know many anatomical parameters of the patient. For measuring these individual parameters we use electronic centration devices with cameras.
Conclusion, notes, comments
Discuss which type of progressive lens is suitable for first wearer of the progressive lens?
Why is so important standard pantoscopic angle for standard progressive lens? Specify average pantoscopic angle?
Why is important to know position of iso-astigmatism lines? What is astigmatism and distortion?