drainage of pathological forms (abscess, cyst, haematoma)
A puncture is often needed in order to perform
body fluid collection – blood, urine, exudate, mucus, pus, joint fluid, cerebrospinal fluid, bone marrow
tissue sampling (biopsy)
Puncture needles
Depending on the type of puncture, standard injection needles or special puncture needles are used. Puncture needles have different diameters and lengths. The puncture needles used to puncture tissues include an inner obturator that prevents the clogging of the needle after penetration into an organ. Special puncture needles called trocars allow instruments to be placed after removal of the obturator.
Overview of some punctures
Lumbar puncture
Insertion site
spinal canal between lumbar / loins / vertebrae L3-L4 or L4-L5
Diagnostic purpose
cerebrospinal fluid (CSF) collection for biochemical, microbiological, serological and cytological examination
delivery of contrast dye
control of CSF pressure
Therapeutic purpose
relief of CSF (in case of overproduction, circulatory disorder, obstruction of cavity pathways, hydrocephalus
administration of therapeutic agents into the spinal canal
delivery of anaesthetics in spinal anaesthesia
Position during procedure
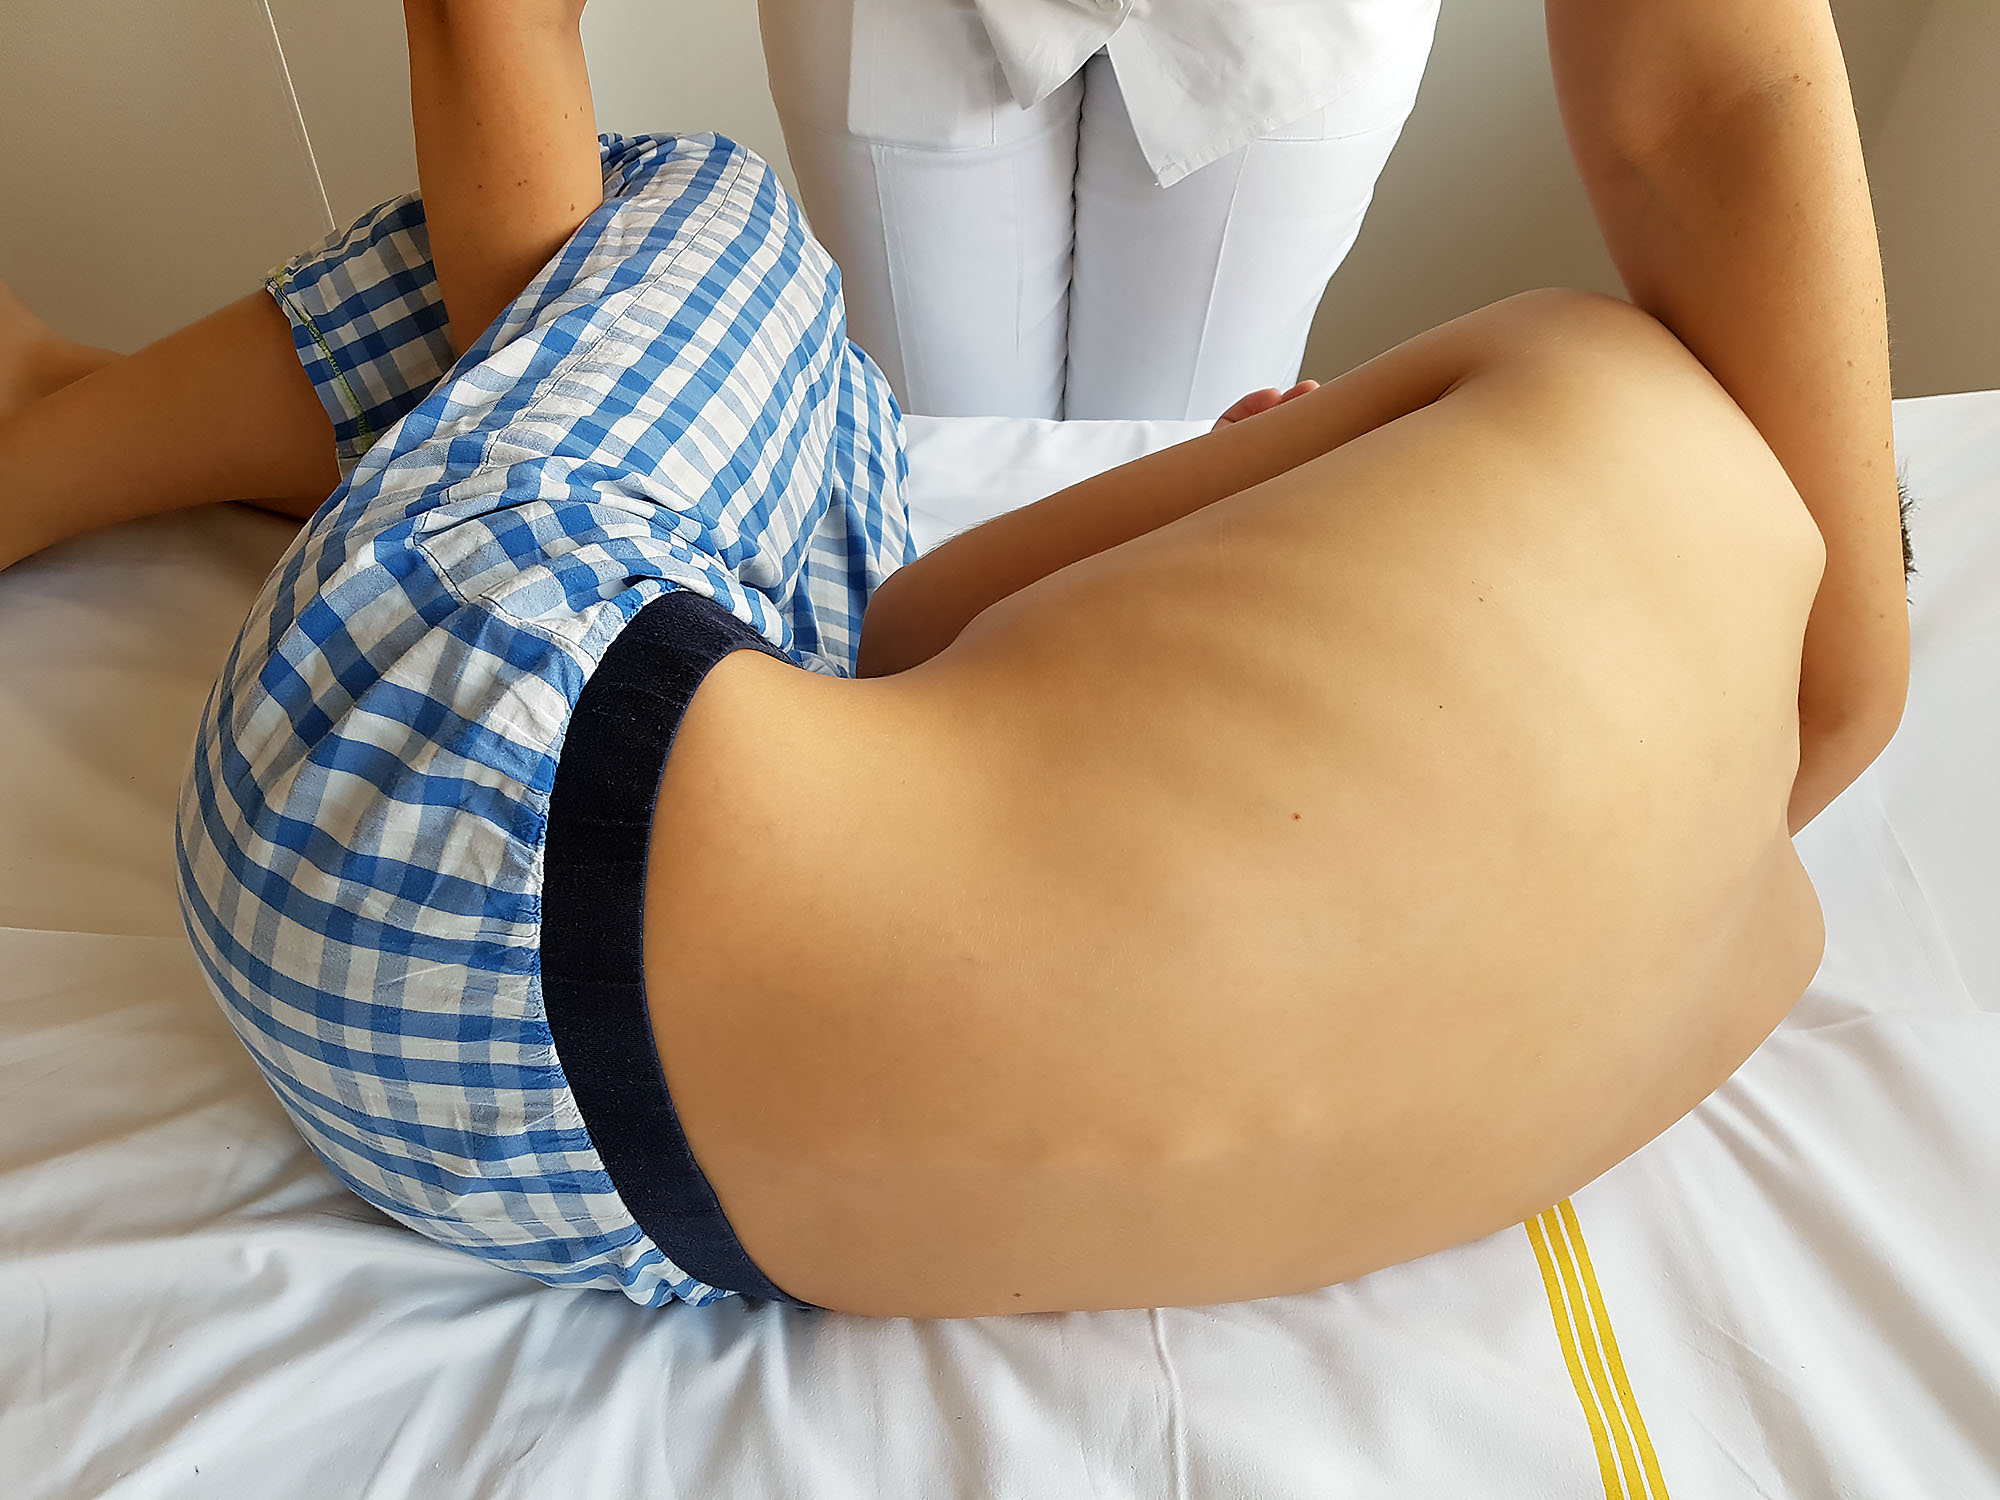
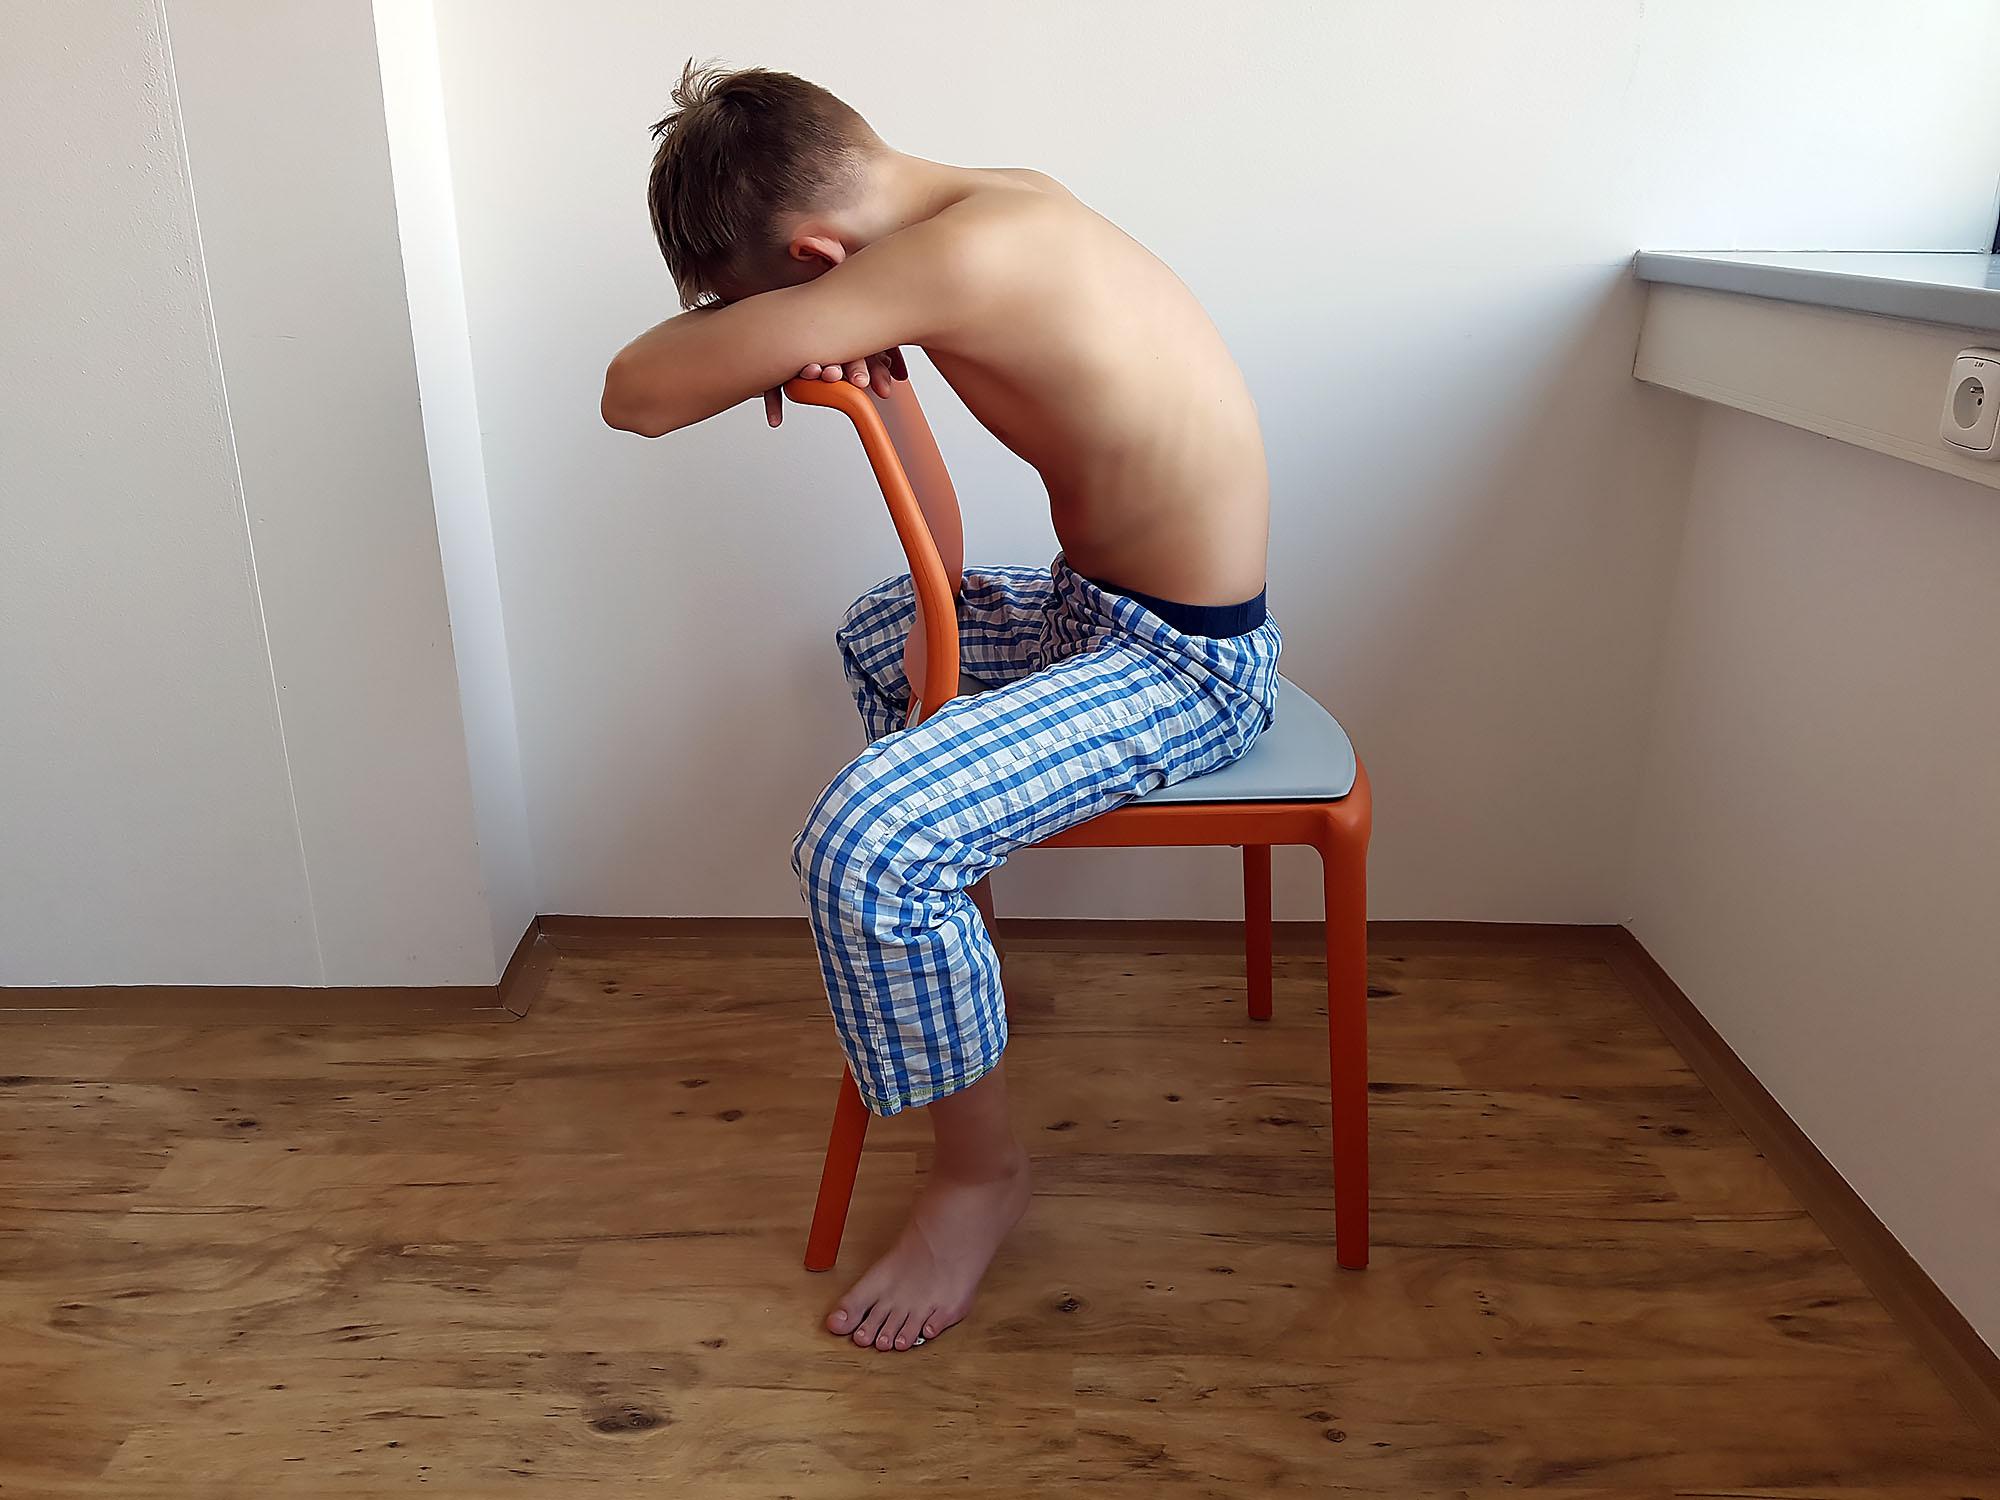
lying on the side, with knees drawn to chest (embryo position)
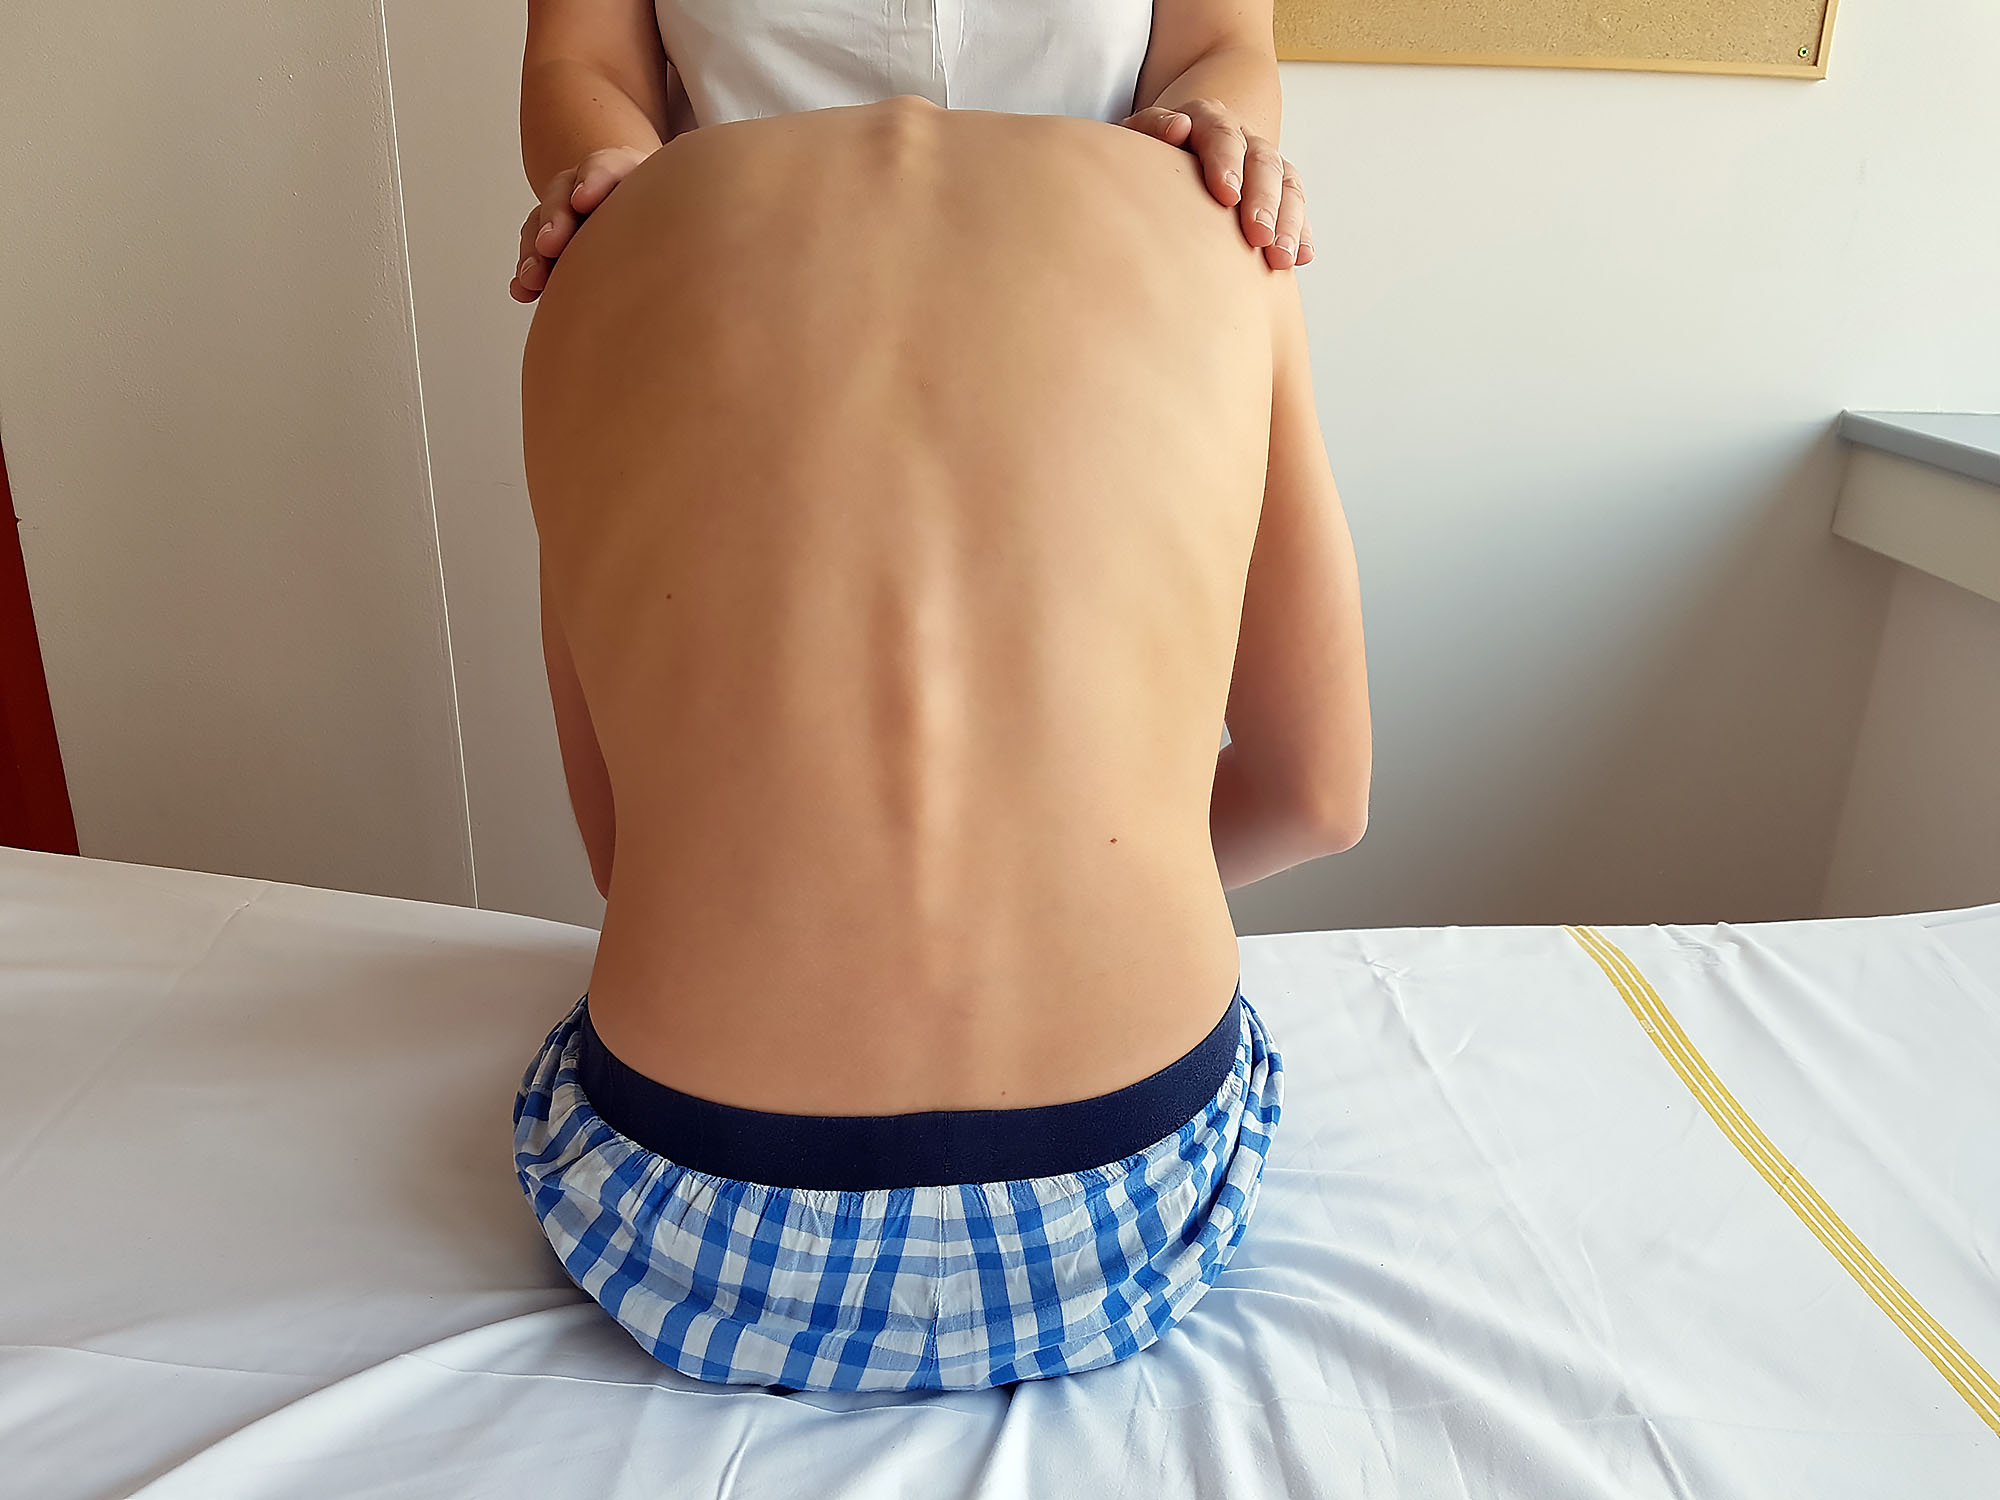
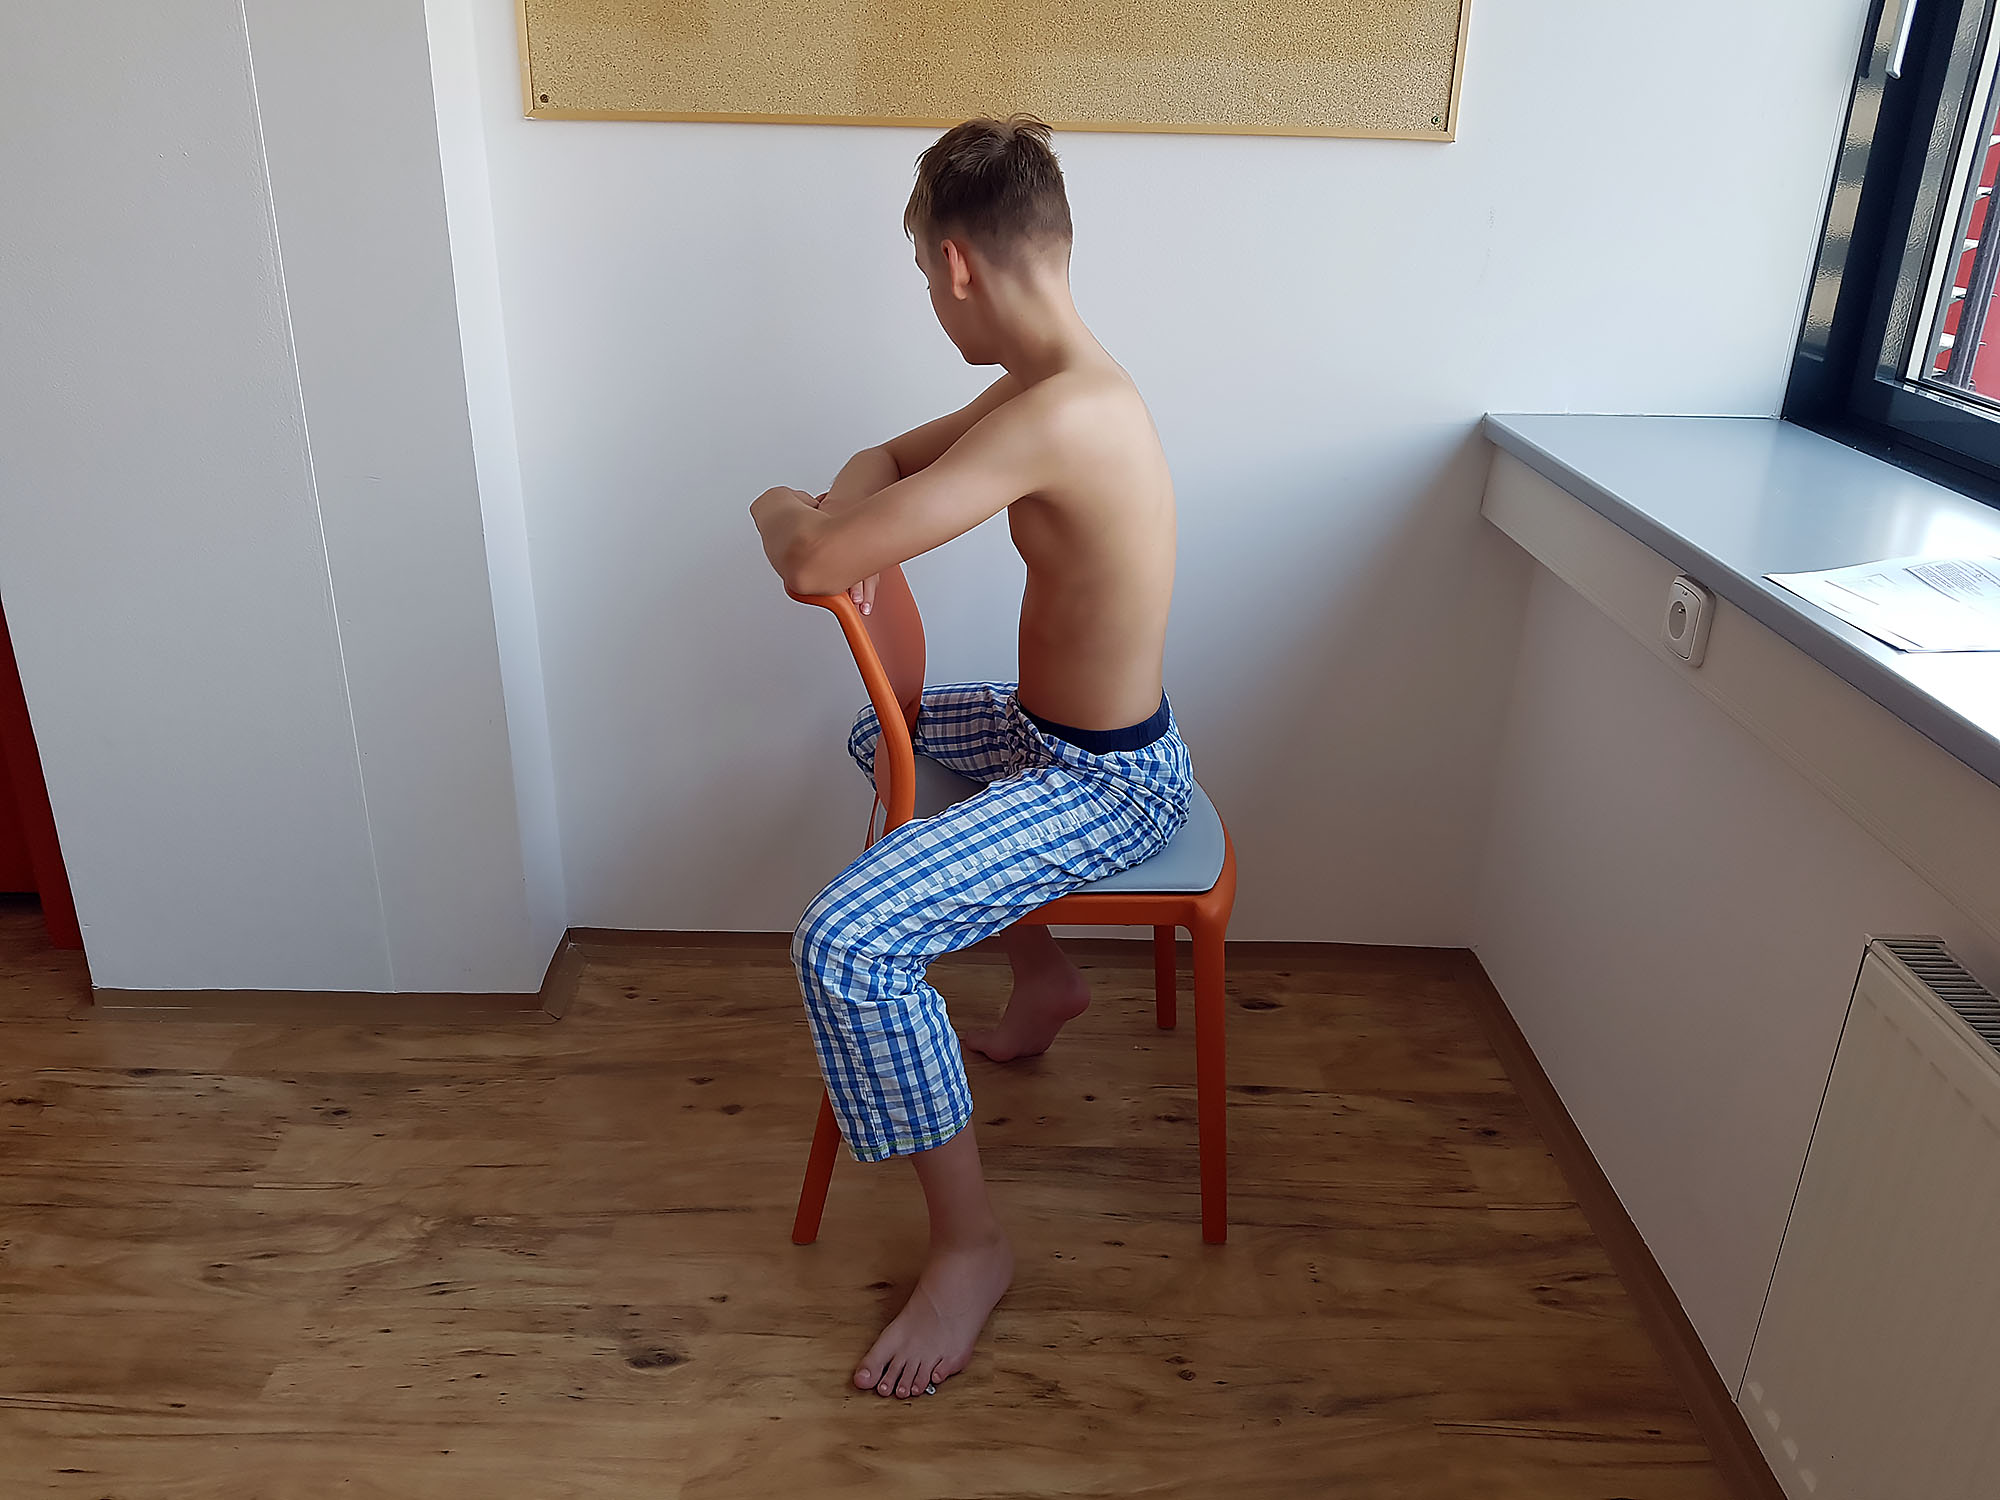
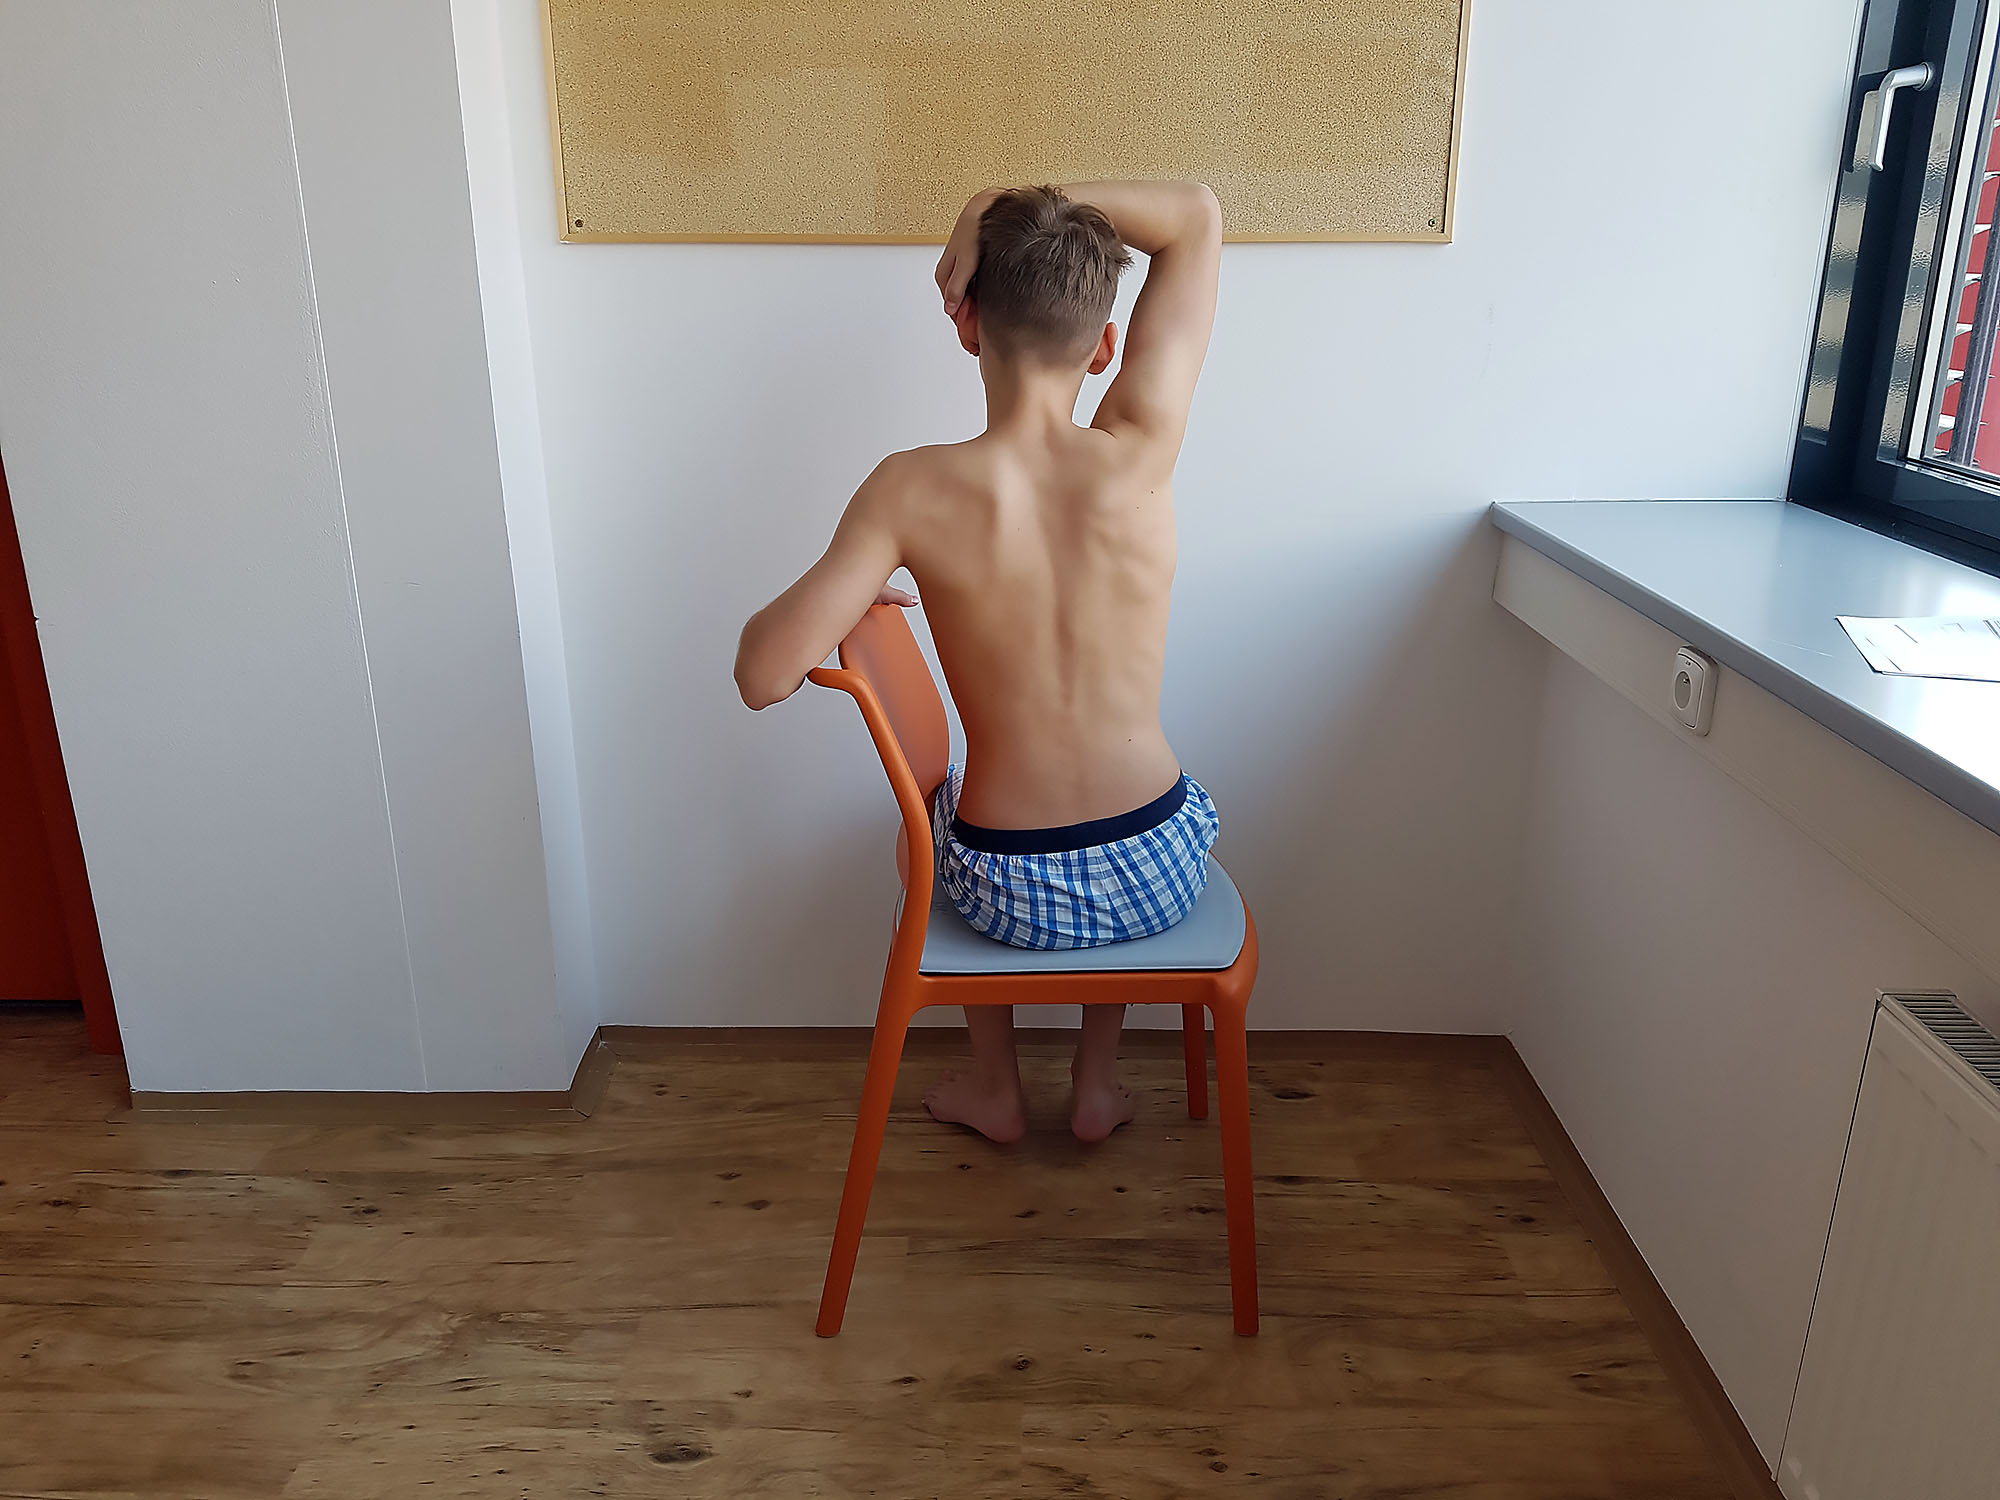
sitting on a bed or chair, leaning forward (cat's back position)
Patient and equipment preparation
inform the patient about the procedure
gain signed informed consent
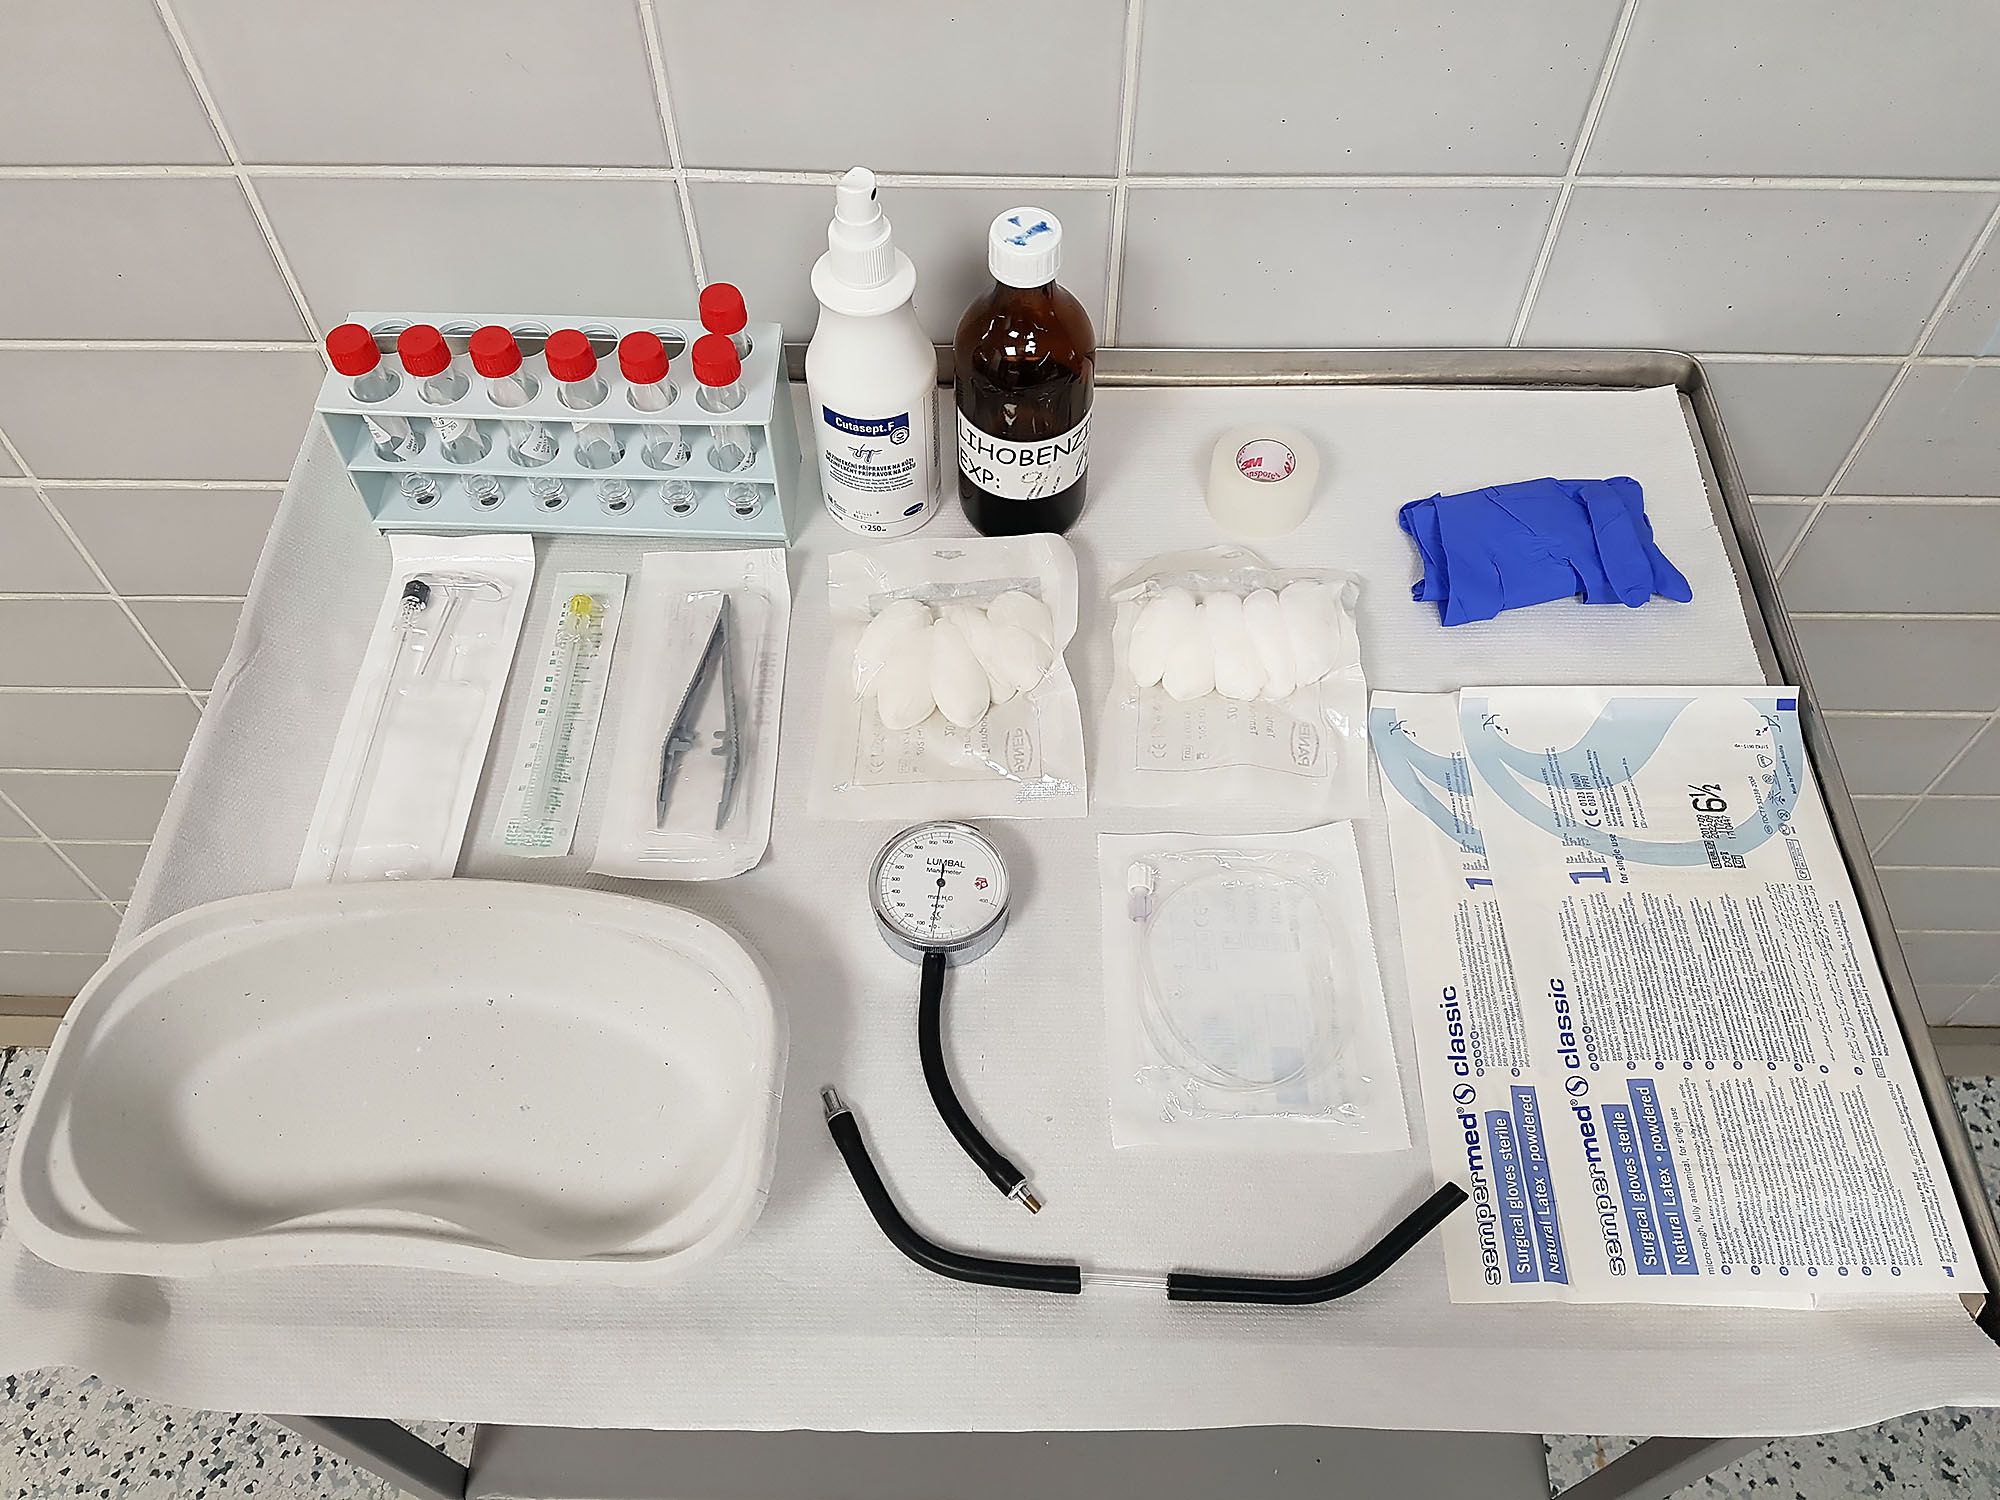
prepare a sterile table with equipment for lumbar puncture
sterile tubes for CSF samples
Claude manometer (for CSF pressure measurement)
Handling after the procedure
horizontal position on the back—for 24 hours after using a traumatic needle, for 4 hours after using an atraumatic needle (with a rounded tip)
increased fluid intake (for faster cerebrospinal fluid production and supplementation)
monitoring vital signs and neurological symptoms (numbness and tingling of the legs, headache, nausea, vomiting, unconsciousness)
monitoring the injection site (swelling, bleeding, leakage)
Embryo position
Cat's back position
Lumbar puncture – equipment
Sternal puncture
Insertion site
chest bone, at the level of the 2nd–3rd intercostal space, in the sternal manubrium in children
Diagnostic purpose
obtaining bone marrow for morphological, immunological and cytogenetic examination (for detection of abnormal development of blood elements, to diagnose anaemia, leukaemia, lymphoma …)
Therapeutic purpose
none
Position during examination
in a horizontal position on the back, resting on a firm surface
Patient and equipment preparation
inform the patient about the procedure
gain signed informed consent
a sterile table with equipment for sternal puncture
biopsy slides and cover glass slides to smear the obtained aspirate
Handling after examination
rest on bed for 2 hours
monitoring vital signs
monitoring the injection site (swelling, bleeding, haematoma)
Trephine biopsy
Insertion site
wing of ilium of the hip bone
Diagnostic purpose
bone marrow aspiration for cytological and histological examination – in contrast to a sternal puncture, trephine biopsy allows for a histological examination (a punch biopsy of bone marrow for microscopical evaluation of the tissue structure, used to diagnose haematological diseases)
Therapeutic purpose
none
Position during examination
on the belly or on the side
Patient and equipment preparation
inform the patient about the procedure
gain signed informed consent
hemocoagulation examination – procedure with increased risk of bleeding
sterile table with equipment for trephine biopsy
Jamshidi needle (special puncture needle for bone marrow biopsy)
fixation solution for the tissue sample
Handling after examination
rest on bed, on the side of the puncture site, compression bandage at the puncture site for 1–6 hours
monitoring vital signs
monitoring for pain (analgesics application)
monitoring the insertion site (swelling, bleeding, haematoma)
Abdominal puncture
Insertion site
insertion site at the Monro point (a point at the right edge of the rectus abdominis muscle, between the umbilicus and the anterior superior spine of the ilium)
Diagnostic purpose
collection of exudate for biochemical, microbiological and cytological examinations
Therapeutic purpose
evacuation of the exudate / ascites from the abdominal cavity (ascites occurs in liver cirrhosis, heart failure, kidney and pancreas diseases, tumours in the abdominal cavity, inflammation and thrombosis in the abdominal cavity, lack of proteins)
administration of therapeutic substances
lavage in peritoneal dialysis
Position during examination
Fowler's position
Patient and equipment preparation
inform the patient about the procedure
gain signed informed consent
abdominal X-ray
weigh the patient and measure the circumference of the belly
a sterile table with abdominal puncture equipment
sterile tubes for aspirated samples
drainage set with graduated collecting container for evacuation of the exudate
Handling after examination
weighing the patient and measuring the circumference of the belly
rest on bed in semi-sitting position for 2 hours
monitoring vital signs
monitoring for pain (analgesics application)
monitoring the insertion site (swelling, bleeding, haematoma)
Pleural puncture (Thoracentesis)
Insertion site
when removing the fluid: in the 6th–8th intercostal space, in the posterior axillary line (below the level of the effusion)
when removing air: in the 2nd–3rd intercostal space, in the mid clavicular line
Diagnostic purpose
collection of exudate for biochemical, microbiological and cytological examinations
Therapeutic purpose
evacuation of exudate or air into a closed drainage system (in order to restore negative chest pressure, to relieve overpressure, and/or allow a collapsed lung to expand)
administration of medicinal substances
Position during examination
the position depends on the insertion site
sitting on a chair, legs wide open, the patient leaning forward into the back of the chair
sitting with the forearms supported
sitting on a chair with the arm raised on the puncture side
Patient and equipment preparation
inform the patient about the procedure
gain signed informed consent
examine the breathing by auscultation and evaluation of respiratory phenomena
examine by tapping and evaluate the sounds
lungs and chest X-ray
ultrasound of the lungs and chest
a sterile table with equipment for thoracentesis
sterile sample tubes
closed drainage system for draining the exudate
Handling after examination
rest on bed in elevated position
monitoring vital signs (with emphasis on the quality and character of breathing, occurrence of dyspnoea, coughing and expectoration)
monitoring pain (analgesics application)
monitoring the insertion site (swelling, bleeding, haematoma)
Puncture (sitting on a chair, legs wide open)
Puncture (sitting with the forearms supported)
Puncture (sitting on a chair with the arm raised)
Renal puncture
Insertion site
depending on the position of the organ, insertion of the puncture needle aided by ultrasound
Diagnostic purpose
tissue sampling for histological examination
Therapeutic purpose
none
Position during examination
on the belly, with abdominal support
Patient and equipment preparation
inform the patient about the procedure
gain signed informed consent
check blood pressure compensation
pause during administration of drugs to check for blood clotting
provide biochemical examination of blood and urine
provide hemocoagulation examination – procedure with increased risk of bleeding
provide ultrasound examination of the kidneys
admission to hospital
fasting after midnight
local anaesthesia, sedation
a sterile table with puncture equipment
fixation solution for obtained tissue samples
Handling after examination
rest on bed for 24 hours, in horizontal position, on the back
compression bandage at the insertion site for 6 hours
monitoring urine (blood in urine, bleeding into the kidney)
sufficient hydration (bleeding prevention)
monitoring vital signs
monitoring pain (analgesics application)
insertion site monitoring (swelling, bleeding, haematoma)
ultrasound to check renal area 24 hours after examination
no physical exercise or bathing in warm water for 14 days after the procedure
Hepatic puncture
Insertion site
depending on the position of the organ
targeted liver biopsy – puncture aided by ultrasound (gaining a sample from a specific part of the liver, directly from the affected source)
non-targeted liver biopsy – puncture not aided by ultrasound (aspiration of any part of the liver, in case of pathological changes affecting the whole liver)
Diagnostic purpose
tissue sampling for histological examination
Therapeutic purpose
none
Position during examination
horizontal position, on the back, with the right hand behind the head
Patient and equipment preparation
inform the patient about the procedure
gain signed informed consent
blood pressure compensation
pause during administration of drugs to check for blood clotting
provide haemocoagulation examination – procedure with increased risk of bleeding
admission to one-day hospital stay (may also be done as an outpatient procedure)
fasting after midnight
local anaesthesia, sedation
a sterile table with puncture equipment
fixation solution for obtained tissue samples
Handling after examination
rest on bed for 24 hours lying on the right side
compression bandage at the insertion site for 6 hours
monitoring vital signs
insertion site monitoring (swelling, bleeding, haematoma)
checking the blood picture before discharge
no physical exercise or bathing in warm water for 14 days after the procedure
Literature
Krišková, A. a kol. Ošetrovateľské techniky – metodika sesterských činností. Martin, Slovakia: Osveta, 2006, pp. 539-555. ISBN 80-8063-202-2
Pokorná, A. a Komínková, A. Ošetřovatelské postupy založené na důkazech 2. díl. Brno, Czech Republic: Masaryk University, 2014, pp. 146-158. ISBN 978-80-210-7415-6