Transfering files to students
Students will appreciate if you give them access to the materials you pre-selected for them, whether it’s video of your lecture, assignments, supplementary pictures, articles or case studies.
Make them available at place where students usually look for them. For most Masaryk University teachers it will be in Information System where each subject has its own folder. For some teachers, like those of the Faculty of Arts it might be Elf. For special cases it is possible to use storage space in MS Teams. Using a place that students know well is a long term benefit, you will avoid constant questions about the placement of materials.
We would like to dedicate the following instructions to the repository in the Information System, which will be used by majority of teachers.
Teachers’ experiences and tips
Instructions and tutorials
-
I just need to upload a file
Each course in IS MU has its own folder where you can upload files for students. By default all folders are visible to everyone on the Internet (the university wants to be open to the world). If you post materials that contain sensitive data, you will need to restrict access to the folder.
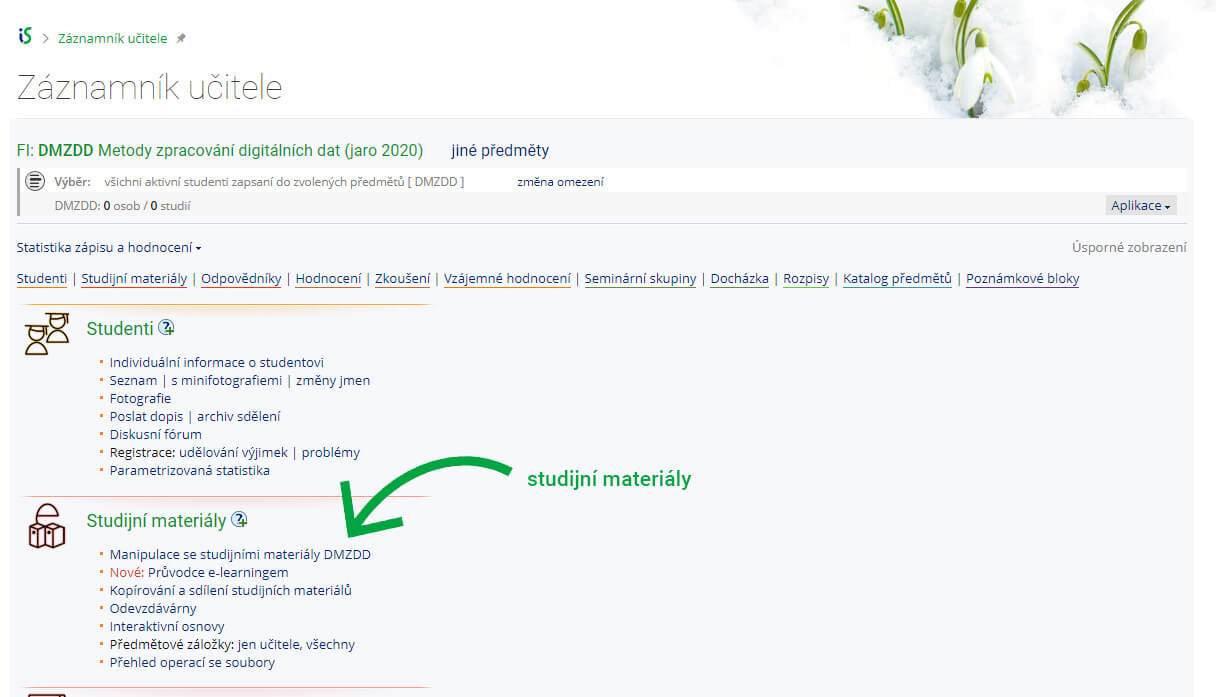
Navigate to the application Teacher's Notebook with selected course, to which you wish to upload the file.
-
In the section study materials click on the Work with study materials of XY.
In the File manager click on the folder where you wish to upload the file. In most cases it would be Learning materials.

In the folder you can either directly upload the file or create another folder.
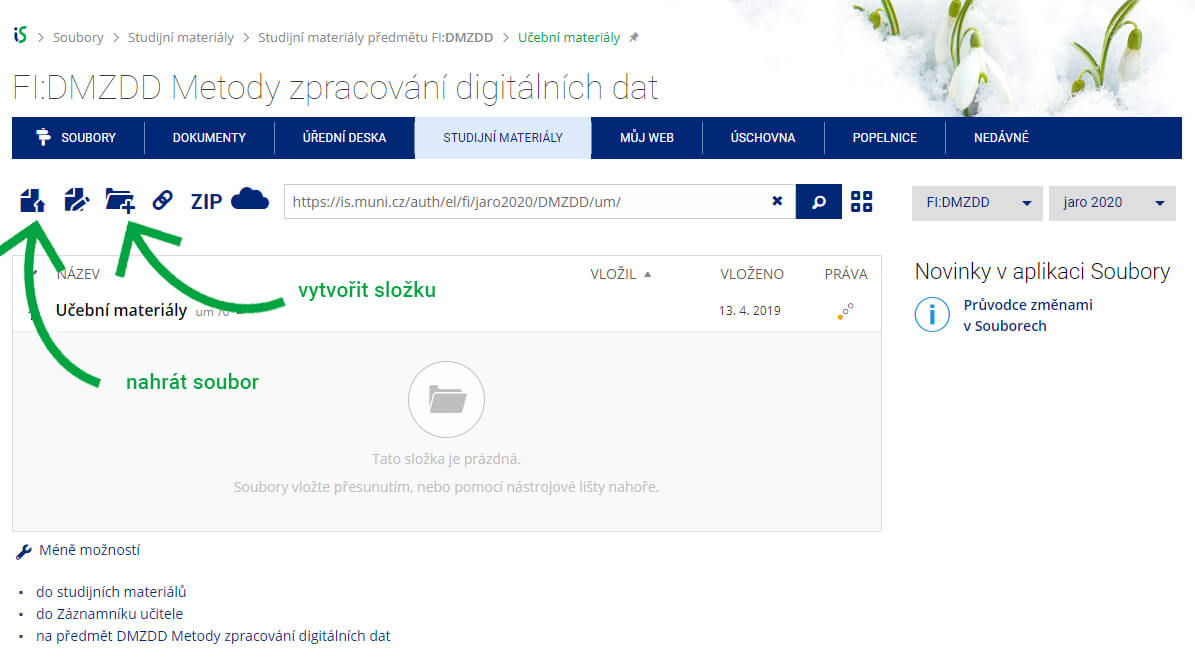
You can drag and drop the files using a mouse or use the button File – Upload.
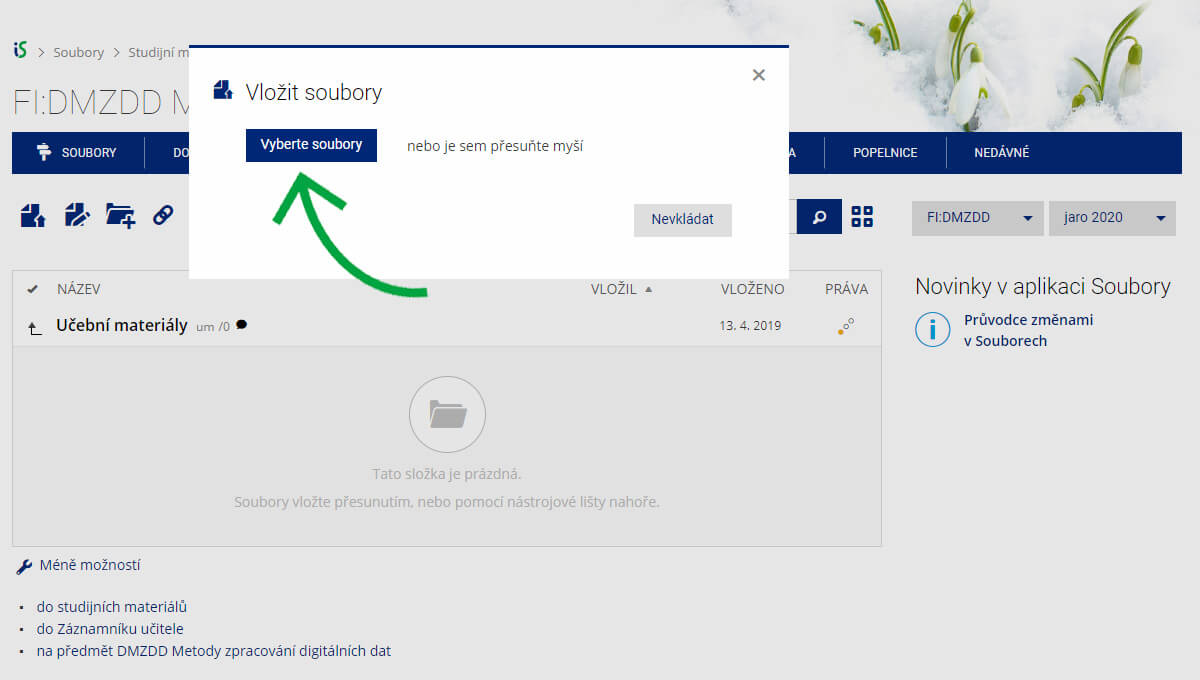
After selecting the files you wish to upload, click on theUpload.
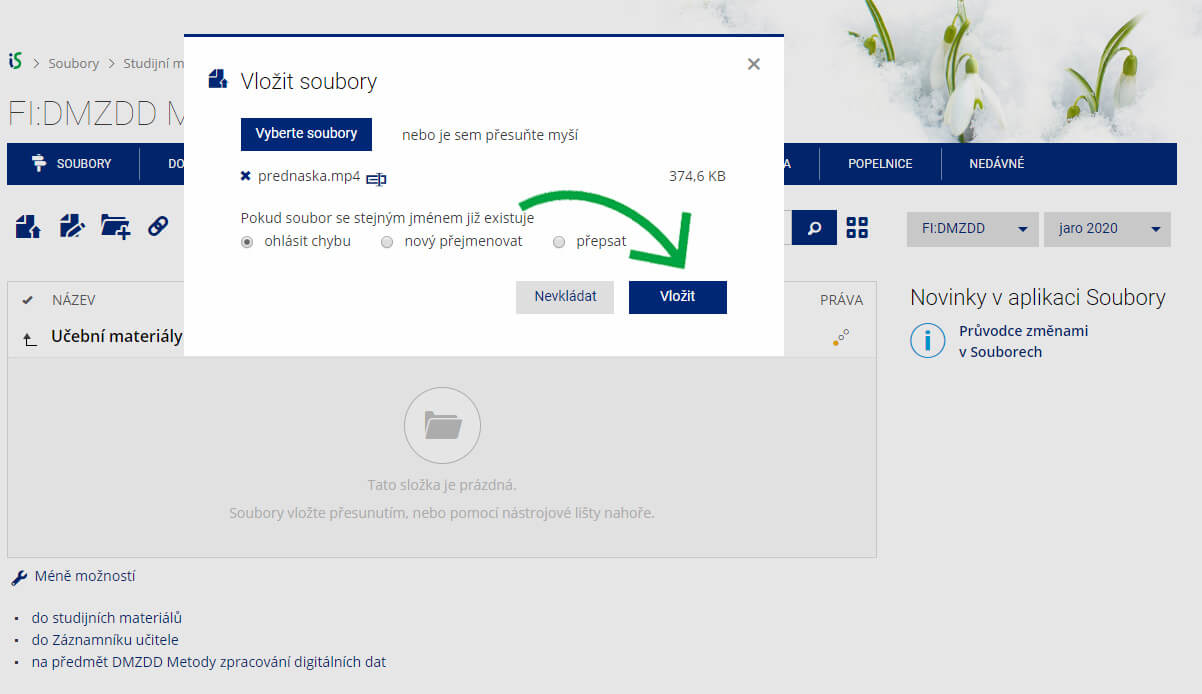
File is now uploaded and accessible to students of the selected course.
Tipy
- Tool tip for Study materials in IS MU/li>
-
I need to upload files with my comment and instructions
Vhodným nástrojem pro vložení materiálů s komentářem je Interaktivní osnova. Ta může sloužit také jako rozcestník všech e-learningových materiálů v kurzu, místo pro vložení studijních textů, videí atp. Postup pro založení interaktivní osnovy je následující:
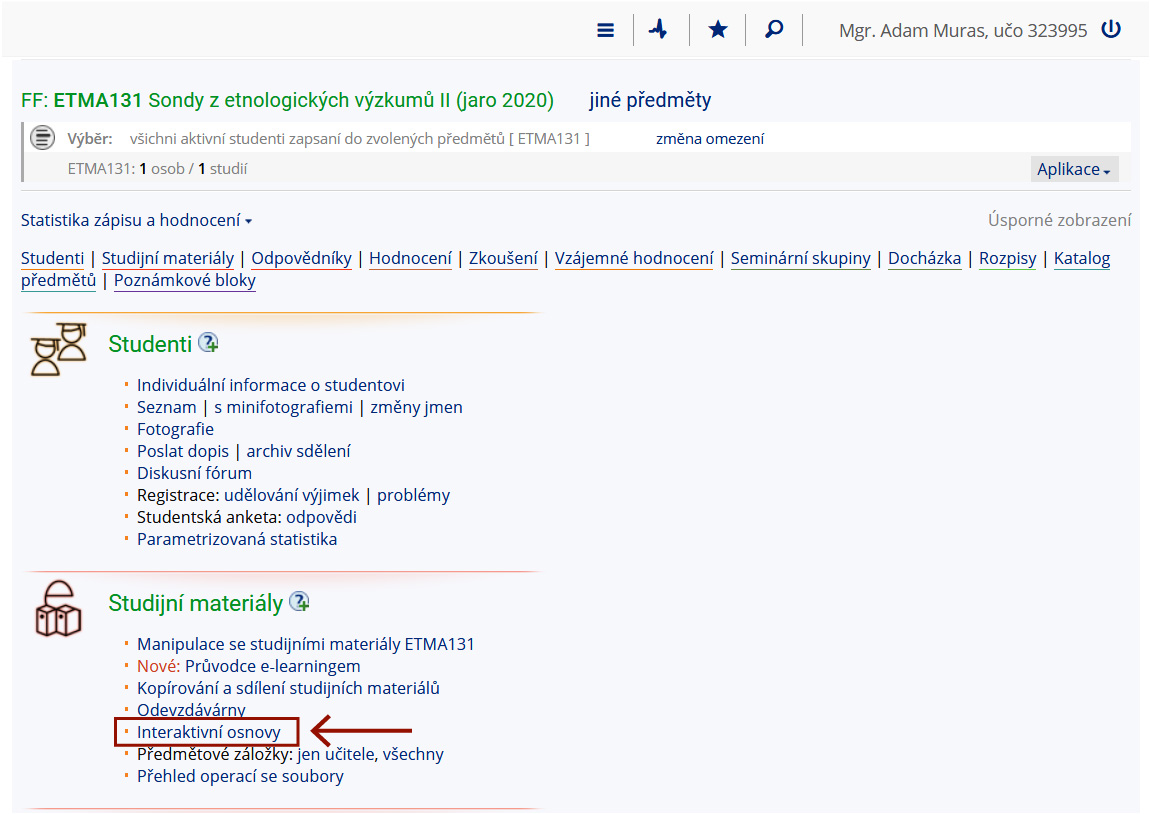
V Informačním systému vyberte v agendě Učitel předmět, ve kterém chcete vytvořit novou interaktivní osnovu.
Zde v sekci klikněte na odkaz Interaktivní osnovy:
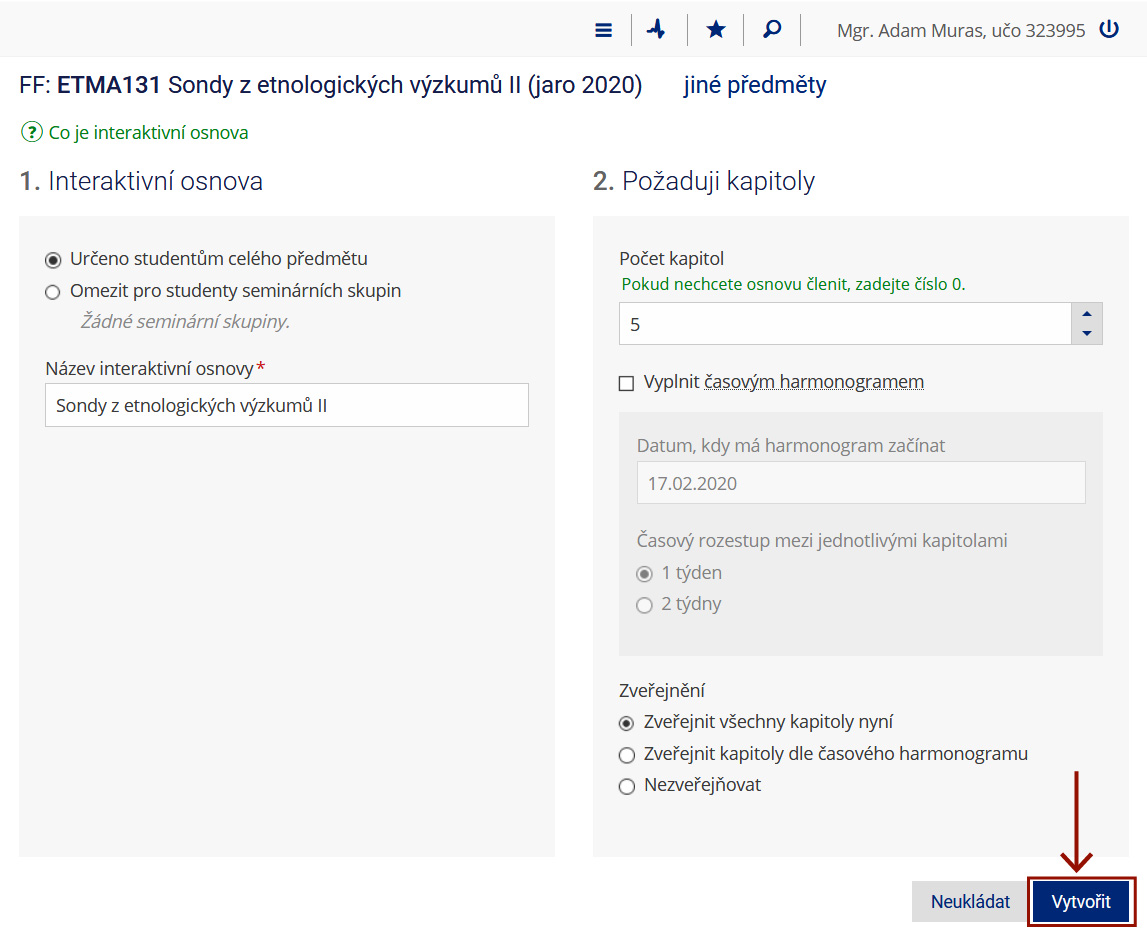
Pokud ještě žádnou osnovu nemáte, tak na další stránce najdete jediné tlačítko Založit novou interaktivní osnovu.

V další nabídce naleznete několik možných nastavení vaší nové osnovy. Můžete tak stanovit, aby už při vzniku měla určitý počet kapitol (takzvaných podosnov, které mohou sloužit např. pro rozdělení materiálů dle jednotlivých týdnů, tematických bloků atp.), omezit přístupová práva na studenty konkrétního semináře, upravit její název atp. V našem případě jsme ponechali osnovu přístupnou všem studentům kurzu a rozčlenili ji na 5 kapitol, které budou viditelné okamžitě.
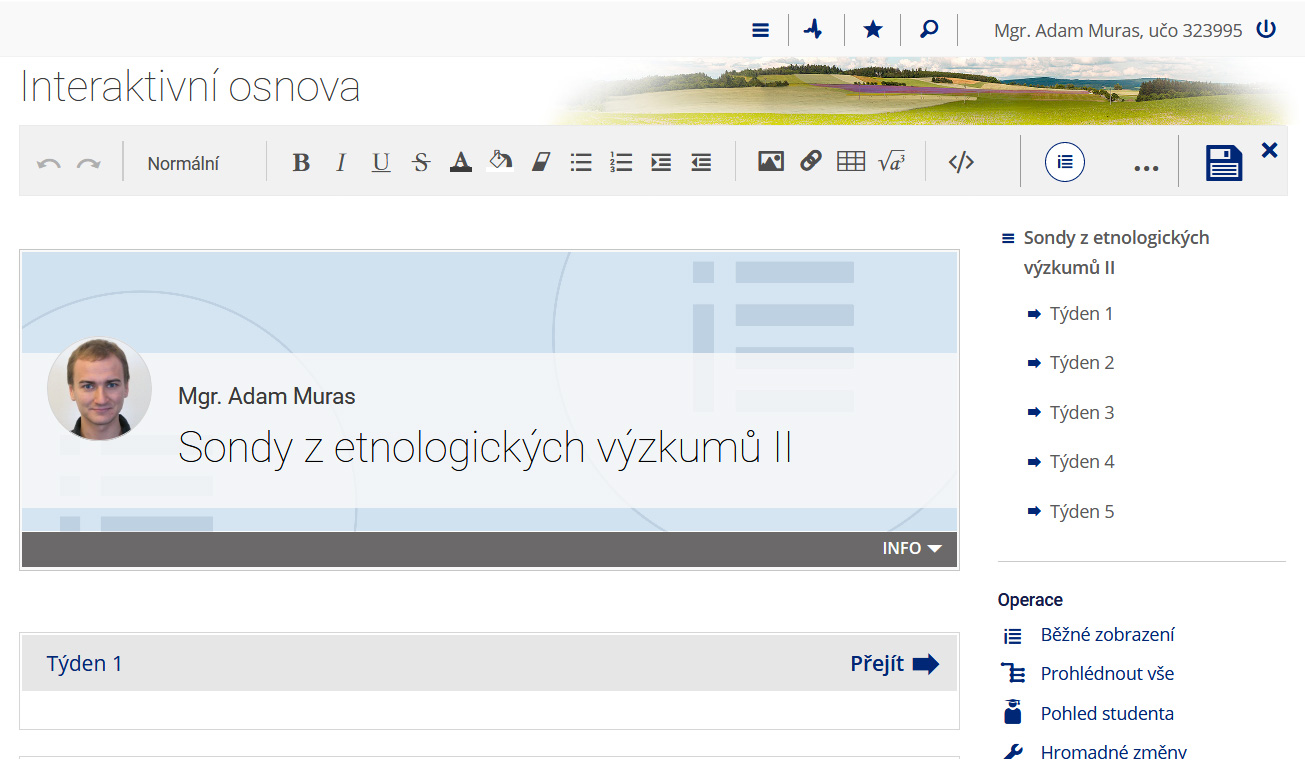
Po potvrzení se nám zobrazí naše nová interaktivní osnova. Nyní ji můžeme začít plnit materiály, upravit názvy kapitol (či celé osnovy), změnit obrázek v hlavičce atp.
Tipy
- Při následných úpravách osnovy nezapomeňte vždy ukládat změny tlačítkem Uložit.
- Detailnější informace k různým funkcím a možnostem interaktivní osnovy naleznete v Nápovědě IS MU.
-
I need to upload a non-downloadable video
In Information system it is possible to secure videos in such a way that students/users are not able to copy and distribute it with regular tools. Videos are stored in encrypted format and only authorized users of IS are able to play them. You can upload multimedia file of your choice (video or audio) and system will take care of the conversion and encryption.
Tip: If you want to include video in Interactive syllabi, skip the following instructions and jump to Transfering files to students .
- Upload video or audio file into Study materials. If you don't know how look at I just need to upload a file.
Select a file (it is possible to choose multiple at the same time) and in Operations choose Vytvořit HTML5 přehrávač / Generate a HTML5 video player.

Let the option Šifrovat… ticked and click on Generate.
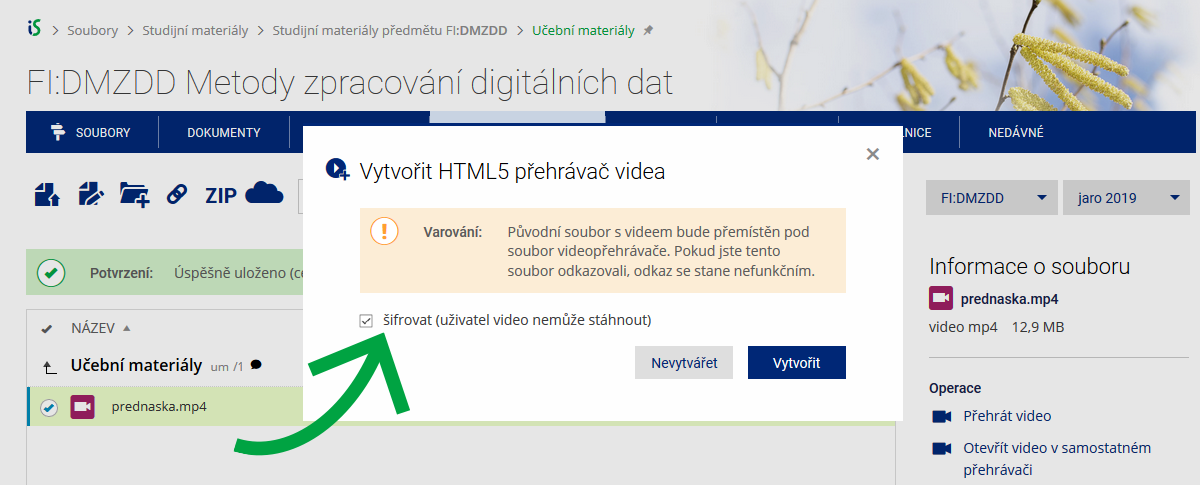
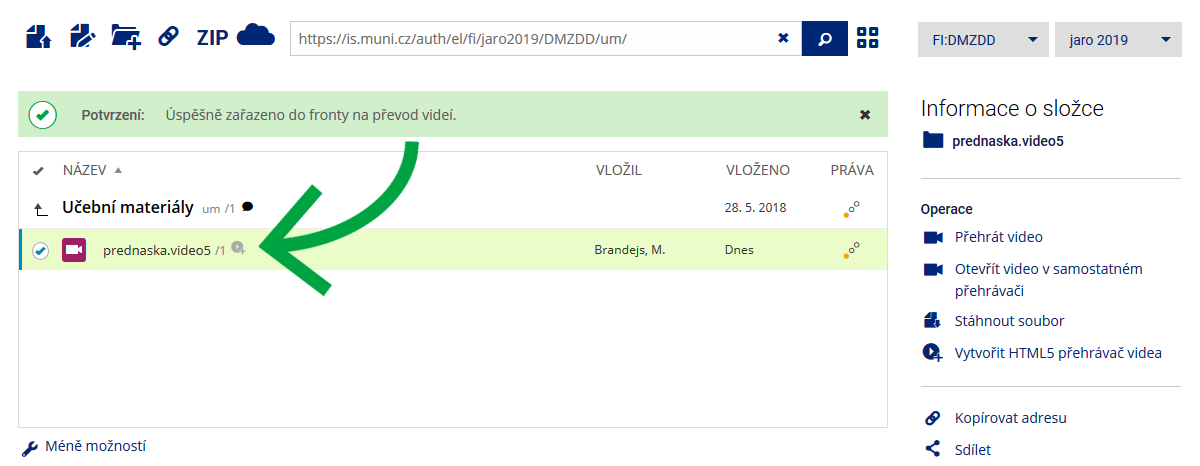
Video player is created and the conversion and ecryption has begun, former video file is preserved but it's viewing rights will be disabled. The conversion process is shown by the icon behind the file's name. It is possible to manipulate with the video player now (eg. put into Interactive syllabi, Discusion group, …), but it will be possible to view the video after the conversion and encryption process (depending on the videos lenght and numbers it can be up to dozen minutes).
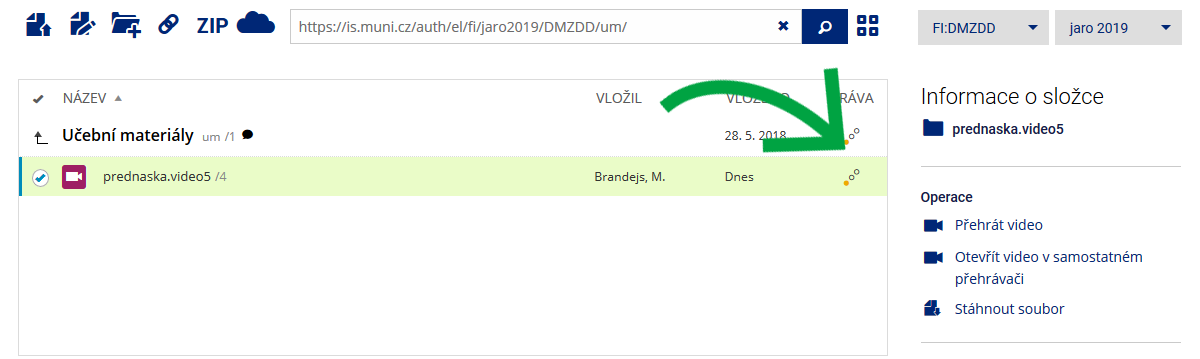
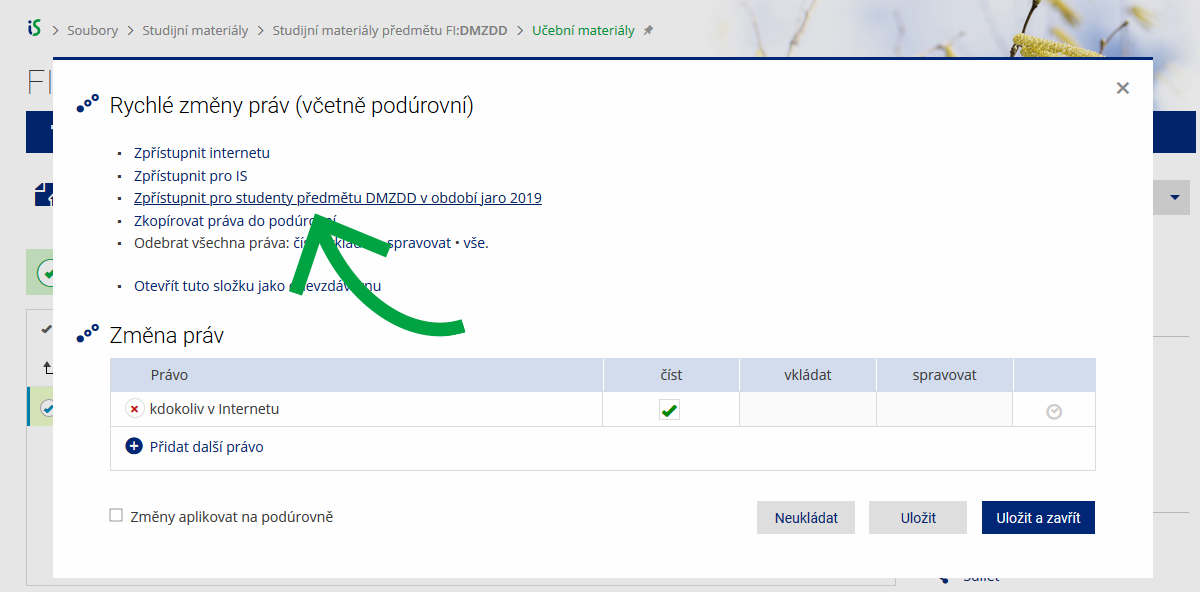
Don't forget to choose the correct access rights, eg. for students of the course. Default setting of the study materials in the IS MU is Anyone on the internet.
Video can be opened in separate window, or can be placed into Interactive syllabi, Discussion group or ROPOT (see following).
-
Insertion to Interactive syllabi
You can insert the video in two ways: directly into syllabi from your computer / smartphone or uploading it into study materials and then into syllabi.
Insertion directly into syllabi
In syllabi editation mode, drag the video file from your computer into chosen place in the syllabi, using so called Drag&drop. Video will be uploaded, converted and encrypted into the system and rights for playing will be set accordingly to the syllabi.
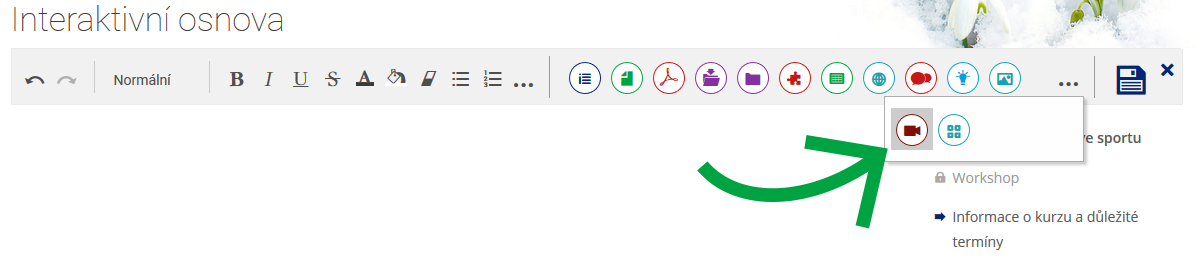
If you are unable to drag the video directly (Drag&drop), you can insert it using the toolbar. Use insert Multimedia (hidden under the three dots icon).
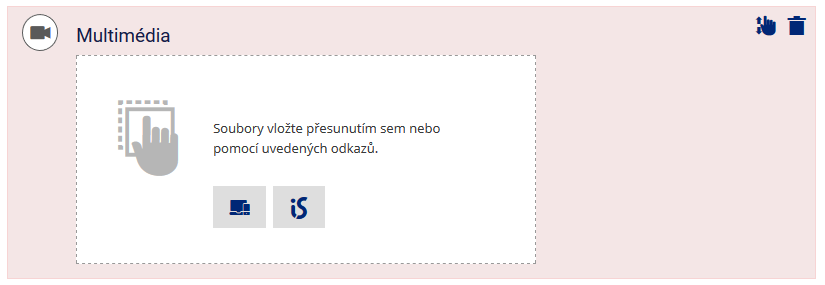
In the newly inserted element choose the computer icon and search the file on your computer/device.
Insertion into syllabi from Study materials
Insert video into study materials according to the instroctions above, don't forget to set the rights.
Edit syllabi and in toolbar use insert Multimedia (hidden under the three dots icon).
In the newly inserted element choose the IS icon.
Search for the file in study materials, select and choose Select. You can select multiple files at the same time.
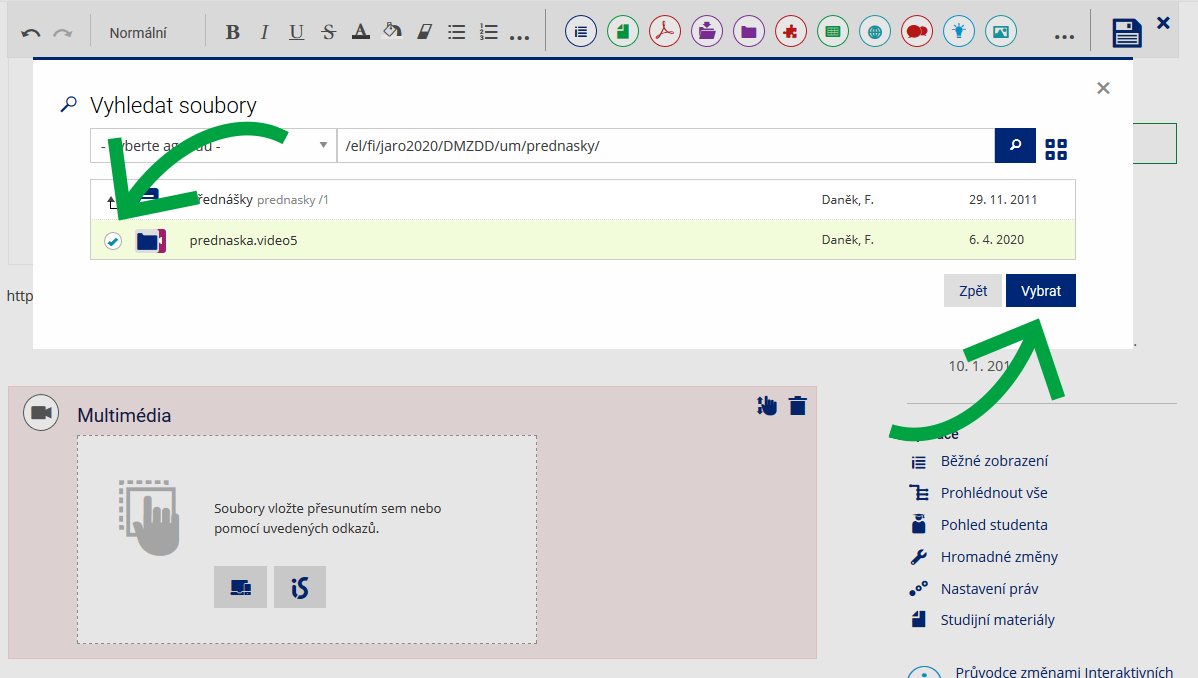
Video will be inserted.
-
Insertion into Discussion group
Search for the video in study materials and copy its address.

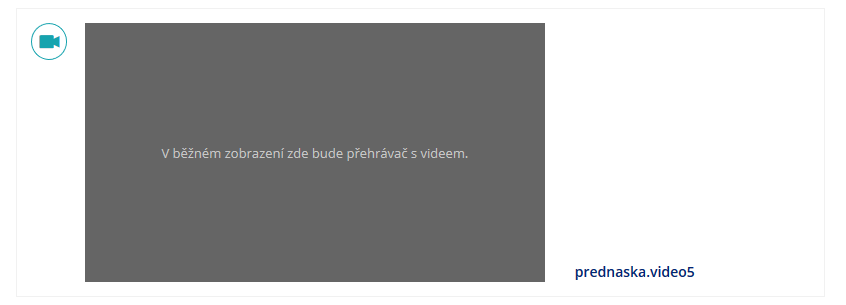
Put the address into discussion thread, after saving the address will be replaced with video player.
Note: This is possible only in the case if you do not have the HTML editor for inserting a post turned on (editor is turned off as default setting for posting in discussion groups).
-
Insertion into ROPOT
Search for the video in study materials and copy its address.
Put this address into the question assignment wrapped in text: <video></video>
<video>https://is.muni.cz/auth/.../soubor.video5</video>
Save the question assignment.
This method works in text editor as well as using the forms (HTML editor).
-
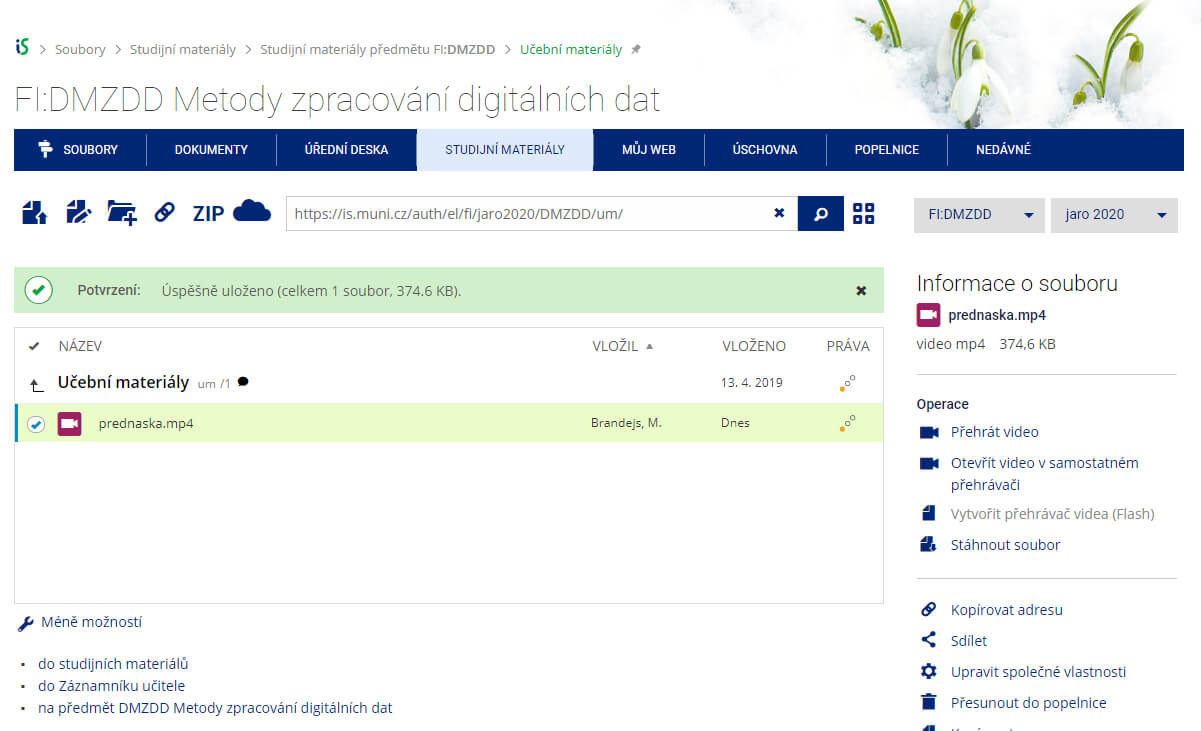
I need a video player for mp4 files
If you have uploaded a multimedia file (MP4 format)into the study materials of selected course, you can easily create a site with video player from it.
-
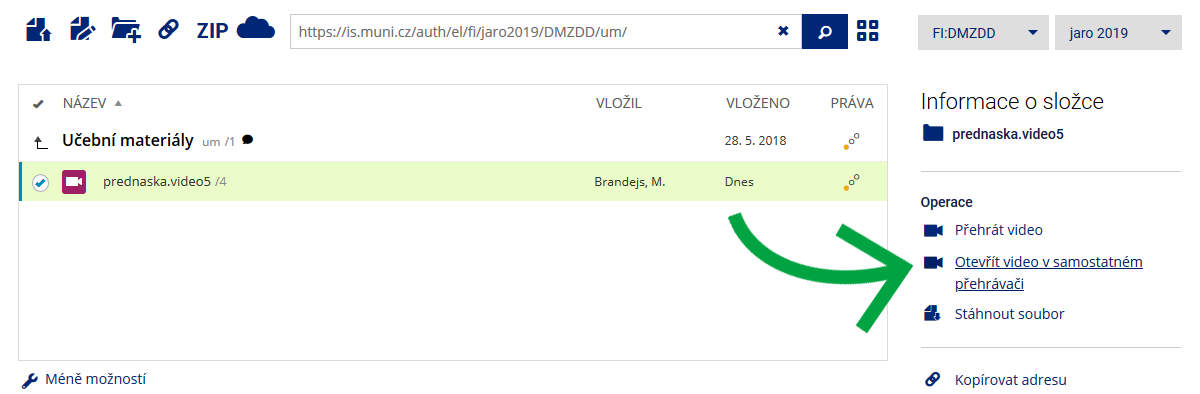
In the directory with the file, make it active by selecting it and choose the option Open the video in the playerin the Operations on the right panel.
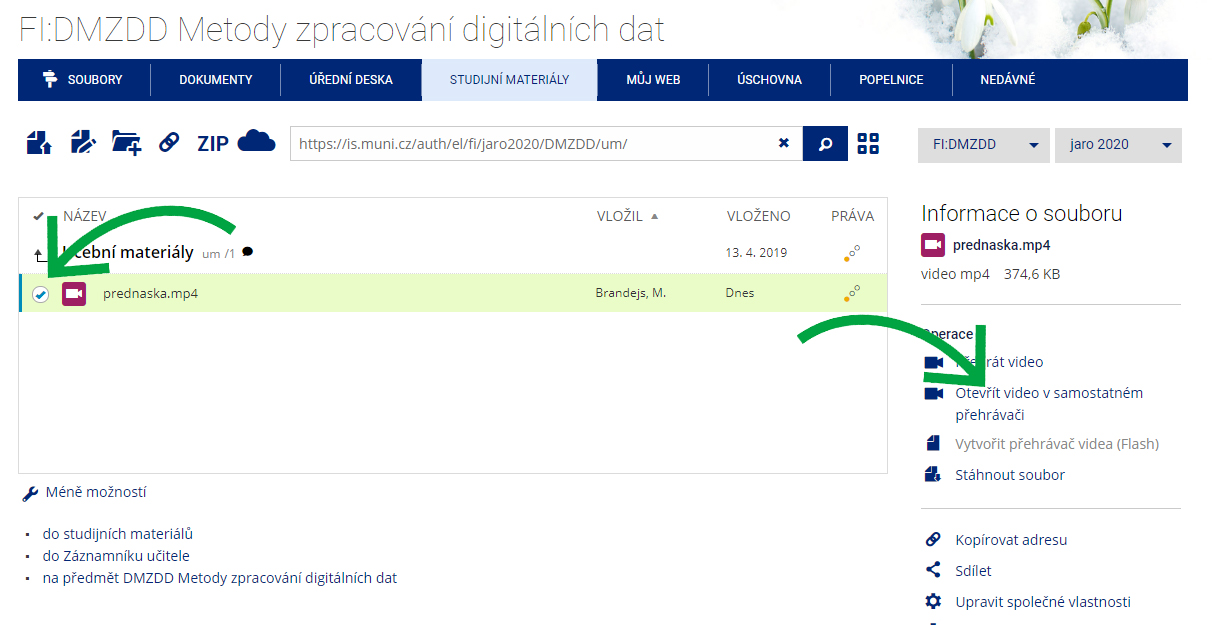
For the option to generate the site, the video needs to be uploaded in the MP4 file format (for example using PowerPoint)
-
You can share the site containing the video with your students.(for example by group e-mail).
- Informing the students – sending group e-mails
-
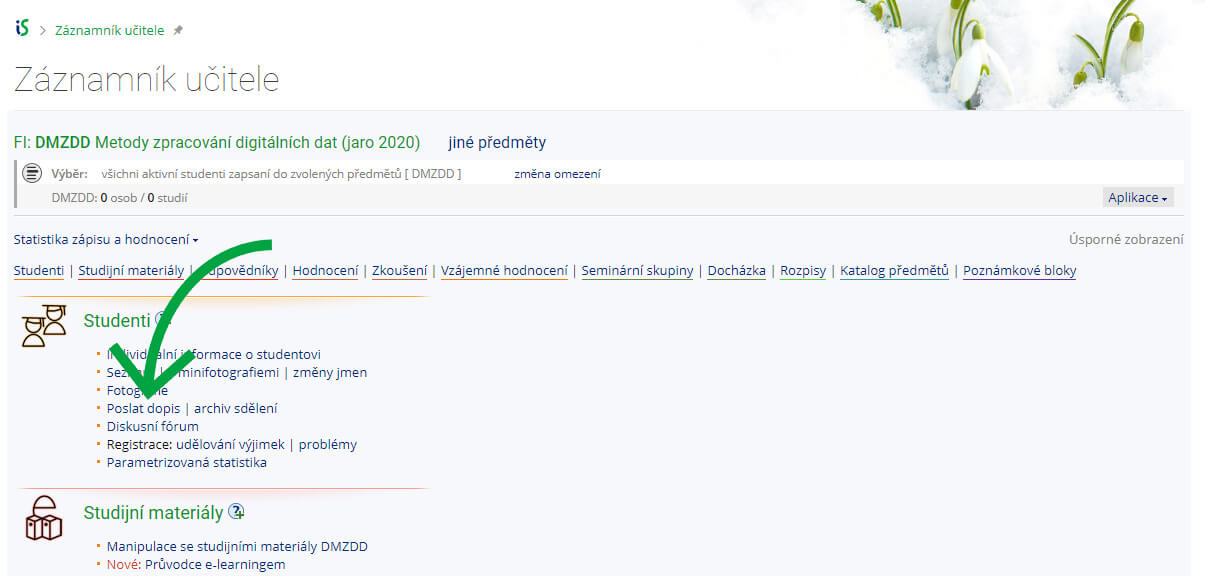
You can easily inform all course students using the application Send mail,which you can find in Teacher's notebook in the section Students as Send mail.
-
You will get into the list of already sent e-mails. Click on the button Dostanete se na seznam svých dříve odeslaných e-mailů, kde kliknete na tlačítko Select another message or create a new one.
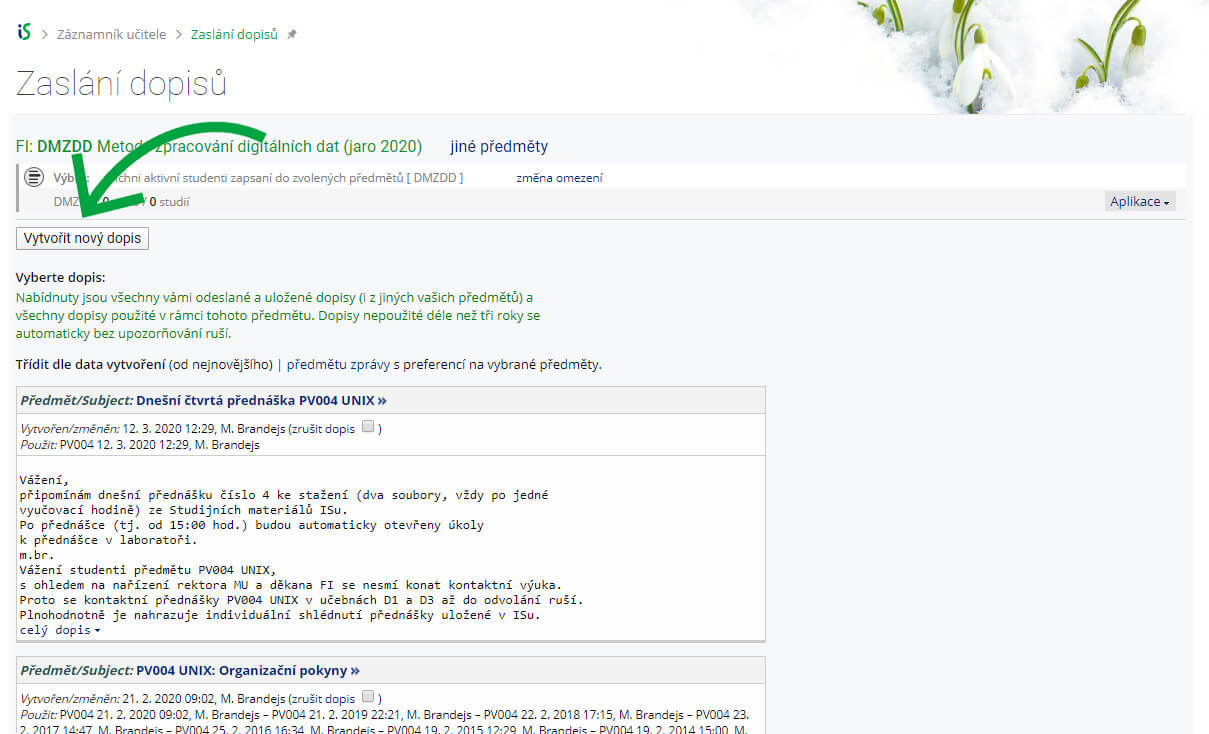
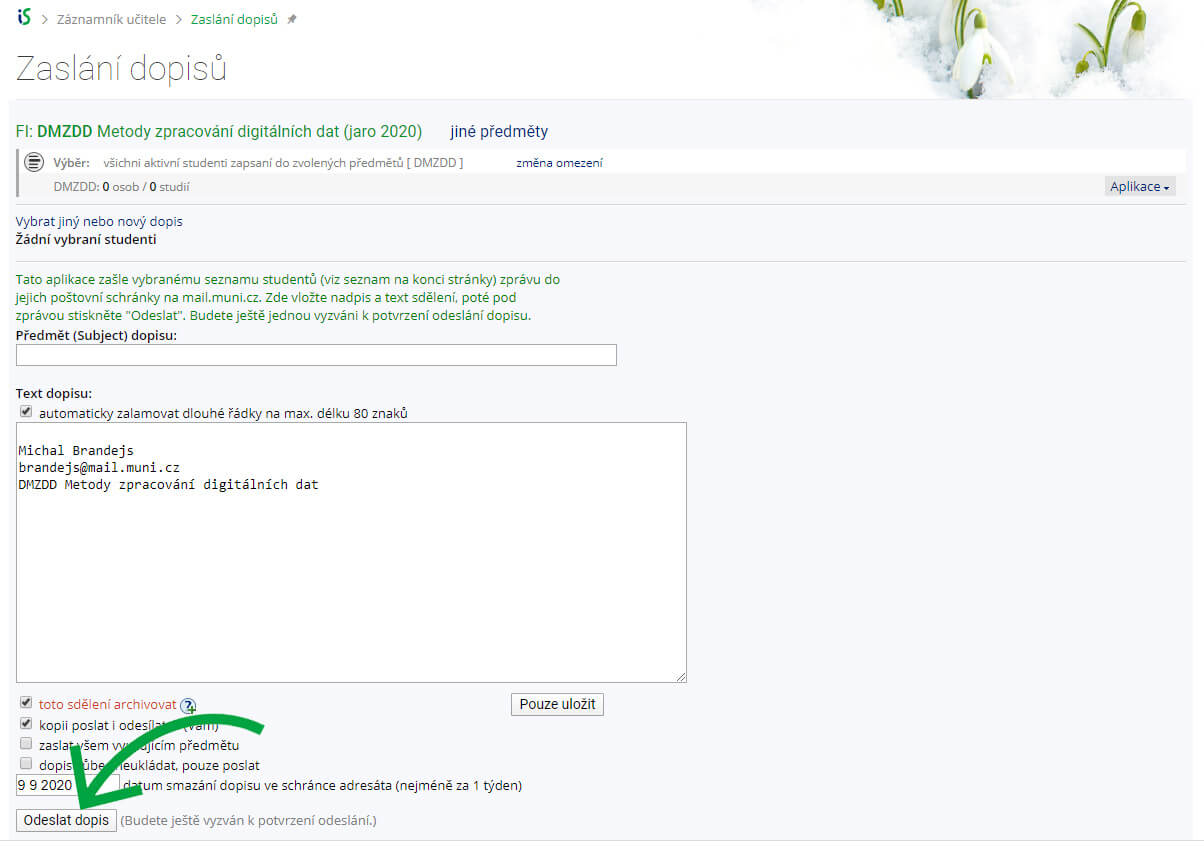
Now you need to create the subject and text of the message. If you do not need any special functions, the group e-mail is pre-set in a way that you can send it without further changes clicking Send letter. Addressees are students of your chosen subject.
Tips
- More at the tooltip of IS MU